Tagged: SharePoint Add-ins
Updating Legacy SharePoint Customizations to the Add-in Model
If you follow this blog, you have probably read many of my posts through the years dedicated to the Add-in (formerly app) model for SharePoint 2013, 2016, and SharePoint Online. Microsoft introduced the Add-in model in SharePoint 2013 to address the various shortcomings associated with running custom code on the SharePoint server — most notably, of course, that custom code cannot be deployed to SharePoint Online in Office 365. SharePoint-hosted Add-ins are great for simple functionality that can be achieved with 100% client-side solutions (HTML, CSS, and JavaScript), while provider-hosted Add-ins allow you to run custom server-side code in Azure or anywhere other than the SharePoint server.
Using the Add-in model is a no-brainer for most new development efforts, especially if you are developing for SharePoint Online and still need to write server-side code. (At the time of this writing, the new SharePoint Framework is still in Developer Preview but is definitely worth adding to your repertoire for client-side SharePoint development in the years to come!)
But what about your existing solutions? Many organizations using SharePoint maintain large portfolios of custom code solutions that leverage different legacy development approaches advocated by Microsoft through the years, and most of the custom code developed for earlier versions of SharePoint cannot be directly migrated to the cloud. If your organization decided to move to the cloud tomorrow, where would you begin?
Taking inventory of your customizations
I have found that most legacy SharePoint customizations can be placed into the following categories:
- User interface enhancements (master page, branding, themes, custom web parts)
- Declarative items (XML for custom site columns, list instances, and content types)
- Timer jobs (and other administrative extensions to the platform) running in SharePoint Central Administration on-premises
These customizations may take the form of farm or sandboxed solutions that depend on SharePoint’s legacy feature framework. In the case of some user interface customizations, custom HTML markup, CSS, or even JavaScript might be embedded directly within a site’s master page file. For the most part, these are situations we should try to avoid as much as possible when migrating our customizations to the cloud for the following reasons:
- Farm solutions cannot be deployed to SharePoint Online.
- Sandboxed solutions that contain managed code can no longer be deployed to SharePoint Online (note that sandboxed solutions contain a managed code assembly by default, even if the solution does not contain any managed code).
- Custom master pages, while still supported in SharePoint Online, should be avoided unless absolutely necessary. (Microsoft has a history of making significant changes to the default master page in SharePoint Online, such as the addition of the app launcher/waffle/Hollywood Squares in the upper left corner. Sites with heavily customized master pages may not always have access to these changes as they are introduced in the future.)
The role of the Add-in model
When migrating these customizations, keep in mind that you will not necessarily be building and deploying a SharePoint Add-in to replace each customization. In fact, in many cases, you will simply be leveraging techniques from the Add-in model. These include paradigms that were introduced and/or popularized with the introduction of the Add-in model:
- Using client-side script wherever possible
- Remote provisioning of assets (everything from CSS/JavaScript files to site columns, content types, etc.) using the .NET Managed client object model (CSOM) or PowerShell
- Running server-side code outside the SharePoint server that communicates with SharePoint via its APIs
In some cases, all you may need to do is build and deploy a “throwaway” provider-hosted Add-in within a local development environment that performs some one-time remote provisioning tasks, but is not intended to be accessed by end users and can be removed after its work is done.
Add-in model techniques enable us to make our SharePoint customizations with a “lighter touch.” By lighter touch, I am referring to a lighter footprint and/or impact on the SharePoint server. As we decrease the burden on the SharePoint server, we enable SharePoint to run more reliably and efficiently while also making it easier to administer and upgrade (at least on-premises…yes, these techniques all work on-prem as well!) To better explain this concept, I put together the table below contrasting legacy SharePoint development approaches with their modern lighter touch equivalents:
| Legacy Approach | Lighter Touch |
|---|---|
| Farm solutions with custom code running in the SharePoint IIS worker process | Provider-hosted Add-in with custom code running outside of SharePoint |
| Farm or sandboxed solutions that deploy declarative artifacts such as site columns, content types, and list instances | Remote provisioning these artifacts from a provider-hosted Add-in using CSOM |
| Custom master pages with embedded markup, styles, and script | Remote provisioning of branding assets, embedding of JavaScript UI customizations using ScriptLink custom actions |
| Custom timer jobs running in Central Administration using the SharePoint server object model | Remote timer jobs running as Windows scheduled tasks or Azure WebJobs using CSOM |
SharePoint Developer PnP: here to help!
Because the Add-in model represents such a strong departure from the way things were done in the past with full-trust code in SharePoint, Microsoft started the SharePoint Developer Patterns and Practices (or PnP) initiative to assist developers with transforming their existing solutions to be cloud-ready as they migrate to SharePoint Online in Office 365.
The PnP team maintains several Github repositories that include reusable, production-ready components, templates, and solution starters that demonstrate the preferred modern approach to SharePoint development — making customizations with a lighter touch wherever possible.
Eric Overfield just published a great blog post detailing the PnP initiative and how you can get involved.
My Pluralsight course
If you are interested in learning more, I recently published a Pluralsight course with lots of demos: Updating Legacy SharePoint Customizations to the Add-in Model. The course covers the process of migrating a heavily customized on-premises SharePoint site to SharePoint Online from start to finish. The clip below is a demo from the course showing how a legacy timer job customization can be made cloud-ready with the help of the PnP Timer Job Framework and Azure WebJobs.
In this course, you will see me leverage the PnP Core Component to drastically simplify writing .NET Managed CSOM code. I also use several great samples and solution starters from the PnP team, all with the objective of easing the pain associated with migrating legacy SharePoint customizations to the Add-in model.
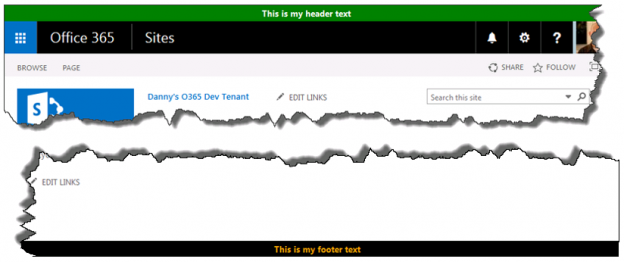
Custom site header and footer using a SharePoint-hosted add-in
In this post, I will show you how to create a custom site header and footer for SharePoint Online/Office 365 that will render on all pages using a SharePoint-hosted add-in. This could be used to post critical alerts or to specify the level of business impact of the content stored within a particular site (e.g., high, medium, or low).
This add-in will accomplish the following, all without a single line of server-side code:
- Upon installation, deploy 3 JavaScript files to the Style Library of the host web
- Register 3 user custom actions in the host web to ensure these JavaScript files are loaded on every page
- Via an add-in part, provide a mechanism for users to enable/disable and set properties of the custom header and footer (e.g., message text, background/text color)
- Store and retrieve configuration parameters for the site header and footer in the host web’s property bag
Rendering a custom header and footer
We might be tempted to edit the master page directly to add a header and a footer, but this is not considered a best practice (especially in SharePoint Online, where master page changes can be rolled out quite frequently). Instead, our add-in will make use of JavaScript techniques to insert
- In SharePoint Online/Office 365, our header (with ID customHeader) will be inserted above thewith ID suiteBarTop (for SharePoint 2013 on-premises, you’ll need to update the script to reference ID suiteBar instead).
- Our footer
(with ID customFooter) will be inserted below thewith ID s4-bodyContainer.- NOTE: The
IDs in SharePoint Online are never set in stone and could change at any time. If they do, you will need to update HeaderFooter.js to reference the newIDs.jQuery makes it easy to create our custom header and footer
elements and insert them in the appropriate location within the DOM with its .insertBefore() and .insertAfter() functions following this approach:$("HEADER TEXT").insertBefore("#suiteBarTop"); $("").insertAfter("#s4-bodyContainer");Making the footer “sticky”
Huge shout-out to Randy Drisgill for his SharePoint 2013 Sticky Footer implementation. The “sticky” footer anchors the footer
to the bottom of the page (or the bottom of the browser window if the available screen real estate exceeds the amount of content on a given page). I only needed to make one change to Randy’s StickyFooter.js implementation, and that was to account for the height offset imposed by the addition of our customHeader:var difference = windowheight - (bodyheight + ribbonheight + footerheight + $("#customHeader").outerHeight());Provisioning files to the host web via JavaScript
For anyone following the OfficeDev PnP, the concept of remote provisioning to allow add-ins to deploy files to the host web should be a familiar one. However, the PnP examples make use of the .NET Managed CSOM to do this, which is a perfectly valid technique but would require us to develop a provider-hosted add-in (allowing that code to run in Azure or some other web server). Since I wanted to create a SharePoint-hosted add-in, I had to find a way to accomplish this using only JavaScript. Thankfully, I found Chris O’Brien’s post with code showing how to provision files to the host web using JavaScript. You will see that my code is based heavily on the example he provides and provisions the following files from the add-in web to the host web:
- jQuery-1.9.1.min.js – jQuery
- HeaderFooter.js – our logic to read the header/footer configuration data from the host web property bag and render the header and footerelements
- StickyFooter.js – Randy Drisgill’s Sticky Footer implementation for SharePoint 2013 (with the one tweak described above)
Add-in part for setting configuration values
The add-in also includes an add-in part (deployed to and rendered from the add-in web) that allows users to enable/disable the header/footer and set the text and colors:
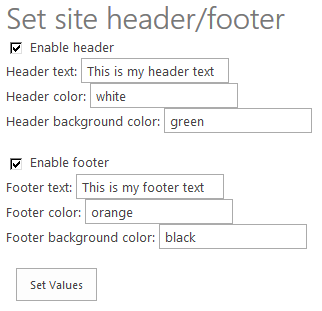 When the add-in part loads, it uses JavaScript to query the property bag of the host web to see if these settings already exist and if so, prepopulates the values in the form. Once the user has made the necessary changes, clicking Set Values will save the changes back to the property bag (again, using JavaScript).
NOTE: The need for our add-in to read and write data to and from the host web property bag requires us to request the FullControl permission at the Web scope in our add-in manifest (AppManifest.xml):
What about MDS?
SharePoint 2013 introduced the Minimal Download Strategy (MDS), which reduces page load time by sending only the differences when users navigate to a new page. While this is a wonderful benefit, it wreaks havoc with solutions that need to manipulate the DOM every time a new page is loaded. In other words, our header and footer may render perfectly on the home page when we first load it, but thanks to MDS when we navigate to the “Documents” library, only part of the page will actually be re-rendered. Our header and footer will not display properly (if at all) when only part of the page is re-rendered to support a new page request.
For much deeper reading on this subject, I encourage you to go through Wictor Wilen’s blog posts introducing the MDS and explaining the correct way to execute JavaScript functions on MDS-enabled sites. My code is based on Wictor’s solution and works properly in scenarios where MDS is enabled and where it is not (e.g., on Publishing sites or any site where the MDS feature has been deactivated).
We handle MDS by calling RegisterModuleInit() with the function we need to execute on every page load in HeaderFooter.js:
if (typeof _spPageContextInfo != "undefined" && _spPageContextInfo != null) {
    // MDS enabled
    RegisterModuleInit(_spPageContextInfo.siteServerRelativeUrl + 'Style Library/Headerfooter.js', DJ.HeaderFooter.Render.initializeHeaderFooter);
}
// Run now on this page (and non-MDS scenarios)
DJ.HeaderFooter.Render.initializeHeaderFooter();
The code
I have posted the code for this add-in to GitHub at the following location:
https://github.com/dannyjessee/SiteHeaderFooter
I encourage you to download it, try it out in your environment, and let me know if you run into any issues with it. My sincere thanks go out to Chris O’Brien, Randy Drisgill, and Wictor Wilen for giving me the building blocks needed to put this add-in together.
Accessing SharePoint Data from Provider-Hosted Apps: Use the Right Context
I have spent the better part of the last two years working with the new app development model for SharePoint 2013. Recently I have focused on building apps that access, manipulate, and interact with data stored in SharePoint Online with Office 365. If you have done any development using the client-side object model (CSOM) for SharePoint, you understand the importance of instantiating the proper ClientContext object to access data in a particular SharePoint site. The ClientContext constructor takes as an argument the URL of a SharePoint site and allows you to access data stored in the Lists collection of the Web associated with it. In this post, I will discuss the various context objects you should use in your provider-hosted app depending on where the data your app needs to access resides and if the user’s permissions need to be considered. If you have been developing apps for SharePoint for awhile now (and even if you haven’t), I strongly encourage you to use Visual Studio 2013 and the Office Developer Tools for Visual Studio 2013 – March 2014 Update.
Host webs and app webs
When dealing with apps for SharePoint, you will become familiar with host webs and app webs:
- Host web – the SharePoint site to which an app is installed
- App web – the special isolated site (a unique app web is provisioned for each installation of the app) where the app for SharePoint’s internal components and content, such as lists, content types, workflows, and pages, are deployed
Note that a provider-hosted app is not required to have an app web, and in fact may not need one depending on your business requirements.
Your app will always have Full Control permissions to its app web. However, your app will need to request (and be granted) permissions by the user installing your app in order to access data in the host web. This is handled through the app manifest.
If your app needs to access data in the SharePoint site where it is being installed, you will be working with a host web context of some sort. As you will see, there are actually two different host web context objects, depending on the app authorization policy you choose.
Life made easy, thanks to SharePointContext.cs
When you create a new provider-hosted app in Visual Studio 2013, you have the option to create a new ASP.NET Web Forms or MVC application to serve as your app’s remote web application. If you are using the Office Developer Tools for Visual Studio 2013 – March 2014 Update, you also have the option to convert an existing ASP.NET web application to an app for SharePoint project (really cool!) In either case, you will notice that SharePointContext.cs is added to the remote web application project. This file contains class definitions for SharePointAcsContext and SharePointHighTrustContext, which allow you to create host web and app web context objects based on whether your trust broker is ACS (which it is with Office 365) or if you are on premises. I won’t delve into too much more detail in this post, but Kirk Evans has an outstanding writeup about these classes.
Accessing data in the app web
To access data in the SharePoint app web from your app, use the following pattern:
CSOM (C#)
var spContext = SharePointContextProvider.Current.GetSharePointContext(Context);

using (var clientContext = spContext.CreateUserClientContextForSPAppWeb())
{
    Web web = clientContext.Web;
    clientContext.Load(web);
    clientContext.ExecuteQuery();

    ListCollection lists = web.Lists;
    clientContext.Load(lists);
    clientContext.ExecuteQuery();
}
REST (C#)
var spContext = SharePointContextProvider.Current.GetSharePointContext(Context);
HttpWebRequest listRequest = (HttpWebRequest)HttpWebRequest.Create(spContext.SPAppWebUrl + "/_api/web/lists");
listRequest.Method = "GET";
listRequest.Accept = "application/atom+xml";
listRequest.ContentType = "application/atom+xml;type=entry";
listRequest.Headers.Add("Authorization", "Bearer " + spContext.UserAccessTokenForSPAppWeb);
JSOM
var appweburl = decodeURIComponent(getQueryStringParameter("SPAppWebUrl"));
var clientContext = new SP.ClientContext(appweburl);
var appWeb = clientContext.get_web();
var appWebListColl = appWeb.get_lists();
clientContext.load(appWebListColl);
clientContext.executeQueryAsync(onAppWebGetListSuccess, onError);
Accessing data in the host web
To access data in the SharePoint host web (the SharePoint site where your app is installed) from your app, use the following pattern:
CSOM (C#)
var spContext = SharePointContextProvider.Current.GetSharePointContext(Context);

using (var clientContext = spContext.CreateUserClientContextForSPHost())
{
    Web web = clientContext.Web;
    clientContext.Load(web);
    clientContext.ExecuteQuery();

    ListCollection lists = web.Lists;
    clientContext.Load(lists);
    clientContext.ExecuteQuery();
}
REST (C#)
var spContext = SharePointContextProvider.Current.GetSharePointContext(Context);
HttpWebRequest listRequest = (HttpWebRequest)HttpWebRequest.Create(spContext.SPAppWebUrl + "/_api/web/lists");
listRequest.Method = "GET";
listRequest.Accept = "application/atom+xml";
listRequest.ContentType = "application/atom+xml;type=entry";
listRequest.Headers.Add("Authorization", "Bearer " + spContext.UserAccessTokenForSPHost);
JSOM
var appweburl = decodeURIComponent(getQueryStringParameter("SPAppWebUrl"));
var hostweburl = decodeURIComponent(getQueryStringParameter("SPHostUrl"));
var clientContext = new SP.ClientContext(appweburl);
var factory = new SP.ProxyWebRequestExecutorFactory(appweburl);
clientContext.set_webRequestExecutorFactory(factory);
var appContextSite = new SP.AppContextSite(clientContext, hostweburl);
var hostWeb = appContextSite.get_web();
hostWebListColl = hostWeb.get_lists();
clientContext.load(hostWebListColl);
clientContext.executeQueryAsync(onHostWebGetListSuccess, onJSOMError);
Note that using JSOM, we still need to construct a ClientContext for the app web before we generate an AppContextSite for the host web, made possible through the SP.ProxyWebRequestExecutorFactory.
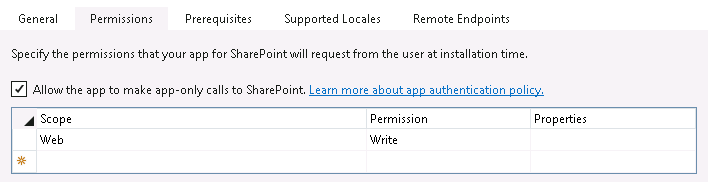
A note about the app-only authorization policy
By default, authorization checks in the host web succeed only if both the current user and the app have sufficient permissions to perform the action in question, such as reading from or writing to a list. We are reminded that the user’s permissions are taken into account based on the names of the context and access token objects we use in these scenarios: for instance, CreateUserClientContextForSPHost and UserAccessTokenForSPHost. However, your app has the ability to do something akin to running with elevated privileges using the app-only policy for authorization. Also controlled through the app manifest, the app-only policy is useful when an app doesn’t need or want to consider the permissions of the current user. In Visual Studio 2013, you can specify that your app would like to have the ability to use the app-only policy by checking this box in the AppManifest.xml editor, on the Permissions tab:
That being said, just because your app is granted this permission does not mean that you can use the same host web context or access token as before to automatically leverage it. To access data from the SharePoint host web (taking only your app’s permissions into account and ignoring the current user’s permissions) from your app, use the following pattern:
CSOM (C#)
var spContext = SharePointContextProvider.Current.GetSharePointContext(Context);

using (var clientContext = spContext.CreateAppOnlyClientContextForSPHost())
{
    Web web = clientContext.Web;
    clientContext.Load(web);
    clientContext.ExecuteQuery();

    ListCollection lists = web.Lists;
    clientContext.Load(lists);
    clientContext.ExecuteQuery();
}
REST (C#)
var spContext = SharePointContextProvider.Current.GetSharePointContext(Context);
HttpWebRequest listRequest = (HttpWebRequest)HttpWebRequest.Create(spContext.SPAppWebUrl + "/_api/web/lists");
listRequest.Method = "GET";
listRequest.Accept = "application/atom+xml";
listRequest.ContentType = "application/atom+xml;type=entry";
listRequest.Headers.Add("Authorization", "Bearer " + spContext.AppOnlyAccessTokenForSPHost);
Remember that in order to use the app-only policy, your app must request and be granted this permission by the site owner who installs your app. Also note that there is no JSOM example using the app-only policy because apps that do not make OAuth authenticated calls (such as apps that are only JavaScript running in the app web) cannot use the app-only policy.
As you can see, the code you write in each of the above scenarios (accessing data in the app web, host web, or using the app-only authorization policy) is identical except for the method or property you use from the SharePointContext class to get the appropriate context or access token. Understanding these subtle differences is vitally important when making sure your app has the ability to access and manipulate the SharePoint data it needs.
SPS Events DC (Chevy Chase) Recap
A huge thank you to everyone who came out to SPS Events DC at the Microsoft office in Chevy Chase, MD today! I was honored to represent Fulcrum at my fourth SPS Event so far in 2014 and speak to a crowd of developers and IT professionals about cloud-hosted apps for SharePoint 2013.
With the recent news from the Office 365 Team about the Autohosted Apps Preview Program (spoiler alert: it ends June 30th), I have refined this talk to focus almost exclusively on Provider-hosted apps for SharePoint 2013. If your organization has made any investments in Autohosted apps (and each of the last two times I have given this talk, at least one person in the audience has), there is a step-by-step guide for transitioning your Autohosted apps to Provider-hosted apps here.
There was tremendous audience participation during my session today, which I always appreciate. We had lots of good discussions about “the art of the possible” with Provider-hosted apps, including when to use CSOM, JSOM, and/or REST in our apps. We also discussed OAuth and the cross-domain library, which allow us to securely access and manipulate data stored in SharePoint from external web applications, whether they live on-premises or in the cloud.
I love speaking at SPS Events DC, which happen each year in Reston and Chevy Chase. The team of organizers and volunteers who put this event together are second to none, and it’s always fun to catch up with so many of my friends and colleagues in the DC SharePoint community.
My slide deck from today’s session is below. The code I used in my sample Provider-hosted app may be downloaded here. Feel free to reach out to me in the comments or on Twitter if you have any questions!

SharePoint Event brings Fulcrum to Boston
Photo courtesy @SPBrennan
As you read in my previous post, Fulcrum frequently travels across Virginia and the DC metro area to speak about the capabilities of the SharePoint platform to software developers, IT professionals, and end users at SharePoint user groups and one-day conferences known as SPS (SharePoint Saturday) Events. These events are held in cities around the world and are completely free to the public. The speakers and attendees at these events volunteer their time and sacrifice a Saturday to help others learn more about SharePoint and all the possibilities it offers. On April 12th, I headed north to Beantown to present at the SPS Boston Event at the Microsoft office in Cambridge, Massachusetts.
Fulcrum develops and maintains many custom solutions built on the SharePoint platform for our Army INSCOM and Department of Education customers, among others. Many of these solutions are built using a paradigm known as “farm solutions,” where custom code utilizes resources on the same servers that run SharePoint. This can potentially have an adverse impact on the performance of the SharePoint environment. To address this, SharePoint 2013 introduces a brand new app development model that allows custom code to be deployed anywhere, including the cloud or even a Java application server! I presented a session entitled “Build Secure Cloud-Hosted Apps for SharePoint 2013.” In this session, I demonstrated different ways that apps hosted in the cloud can securely work with data stored in SharePoint and discussed how the new app model has the potential to revolutionize SharePoint development, making SharePoint farms run more reliably and efficiently while helping our customers to realize significant cost savings.
If you are interested in learning more about SharePoint 2013 and the new app development model, I encourage you to reach out to me—or any other member of the SharePoint community—anytime. Members of the SharePoint community pride themselves on being accessible and are eager to share their knowledge, guidance, and advice with other SharePoint users around the world. To find the next SPS Event near you, visit http://spsevents.org.
Fulcrum Presents at Regional SharePoint Events
Many of our government customers leverage different versions of SharePoint to collaborate, automate business processes, and share data. Fulcrum has developed numerous custom solutions built on the SharePoint platform. In addition to being a robust and feature-rich platform, SharePoint is widely known for its enthusiastic community of developers, administrators, and end users who freely volunteer their time and energy to share their knowledge at one-day conferences known as SPS (SharePoint Saturday) Events, as well as local and regional SharePoint user groups around the world. These events are completely free to the public, who also volunteer their time to learn more about SharePoint and all the possibilities it offers. I have had the privilege of representing the talented SharePoint professionals at Fulcrum, presenting at several such events over the past few months.
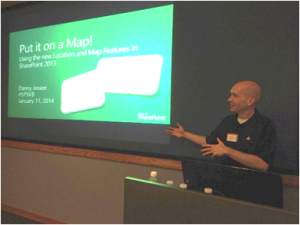 Last November 7th, I presented an introductory session on the new app development model for SharePoint 2013 at the Federal SharePoint User Group and Women in SharePoint DC. This paradigm shift for custom development promises greater reliability and up-time in on-premises SharePoint environments like the ones our customers rely on for critical mission operations. On January 11th, I had the privilege of presenting at SPS Events – Virginia Beach. This was the third year I have spoken at this event. My session was entitled Put it on a Map! Using the new Location and Map Features in SharePoint 2013. As the name implies, I spoke about the many enhancements the latest version of SharePoint offers with respect to “geolocation metadata”—essentially plotting data associated with a particular location on a map. This gives us the potential to bring engaging mapping solutions to our clients and their customers more readily and reliably than ever before. These capabilities are of particular interest to our defense and military customers, where enabling our Armed Forces to quickly and efficiently find information based on a geographic location can save lives. I also presented the Put it on a Map! session at the Reston SharePoint User Group on March 10th.
I will be representing Fulcrum at SPS Events – Boston on April 12th and at several other SPS Events and user groups in the months ahead, presenting more advanced sessions about building secure cloud-hosted apps for SharePoint 2013.
 If you are currently using SharePoint, or are just interested in learning more about it, I encourage you to reach out to me—or any other member of the SharePoint community—anytime. Members of the SharePoint community pride themselves on being accessible and are eager to share their knowledge, guidance, and advice with other SharePoint users around the world. If you are interested in learning more about Fulcrum’s capabilities, I encourage you to visit our website at http://www.fulcrumco.com.
Using JSOM to write (small) files to a SharePoint 2013 document library
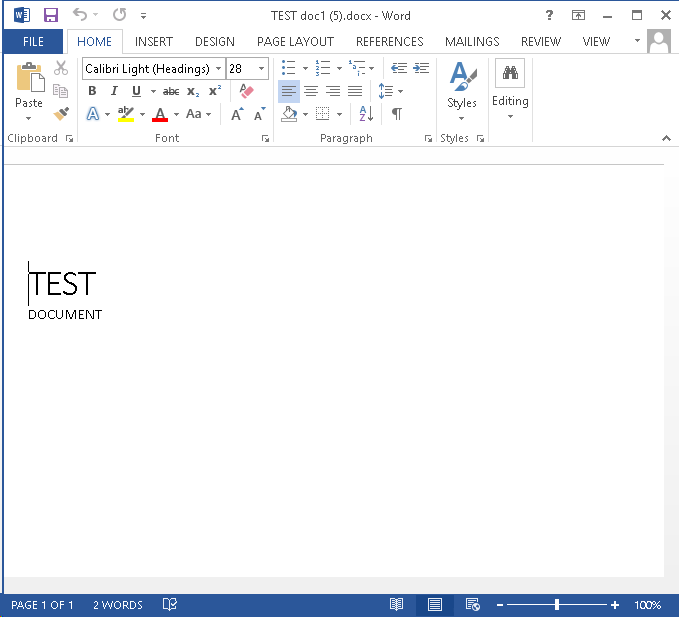
Update 8/24/2017: The code for this app is available for download here.
Update 3/3/2013: Problem solved! The culprit: “Protected View” in Office 2013. Thanks to this blog post from Tobias Lekman, after disabling protected view in each of the Office 2013 applications (I had to update these settings separately in Word, Excel, and PowerPoint), every document I uploaded using the code below opened without any errors on my CloudShare VM.
Update 2/16/2013: The issue I had opening files uploaded into SharePoint described below may not be an issue after all. As it turns out, the CloudShare VM where I was doing my development and testing is generating the same error for ANY document I upload, even “the old fashioned way.” I accessed the same document library from a remote client and the same products that generated errors when being uploaded using the code above opened just fine, without any issues or errors. I will update this post as I learn more about the root cause of this problem.
A recent post on Yammer lamented the lack of examples in the SharePoint 2013 API documentation that use the JavaScript Object Model (JSOM) to do anything more than create a very basic text file in a SharePoint document library.
After lots of digging and a fair amount of trial and error, I now understand why that is the case.
The use case seems simple enough: allow the user to select a file from his or her local machine using an HTML DOM FileUpload object on a form, then use JSOM to upload this file into a document library. It’s certainly easy enough to do using the Client Script Object Model (CSOM). As it turns out, there are a couple of very good reasons why your document upload capability (whether you package it into an app for SharePoint or something else) should NOT leverage JSOM:
- Per MSDN, you can only work with files up to 1.5 MB when using JSOM. It is recommended that you use REST to deal with larger files. (Incidentally, there is a comment in the article on using the REST endpoints that reads “See How to: Complete basic operations using JavaScript library code in SharePoint 2013 for a code example that shows you how to upload a binary file that is smaller than 1.5 MB by using the SharePoint 2013 Javascript object model.” Unfortunately, the only code example in that article creates a very rudimentary plain text file.)
- Unless your browser supports the File APIs introduced in HTML5 (specifically the FileReader API), you are out of luck. As a general rule, browsers will block attempts by JavaScript to access and read files from the local file system for security reasons. If you are using IE, only version 10 supports the FileReader API.
Although I was somewhat discouraged by this news, I was determined to develop an app for SharePoint 2013 that presented a simple file upload control to the user and stored the file in a document library (as long as it was smaller than 1.5 MB, of course). I figured as long as I could save Office documents to the library (i.e., more than a simple plain text file), I would have succeeded.
To accomplish this, I knew I would need to make use of the HTML5 FileReader API. (Because of that, I also knew I would need to test this solution using IE 10, Firefox, or Chrome!) Based on the MSDN documentation, I knew I would be setting the contents of the file by using a new SP.Base64EncodedByteArray. The FileReader API exposes three methods for reading the contents of a file:
- readAsText() – this method reads the plain text contents of a file, but does not properly handle binary files.
- readAsArrayBuffer() – this seemed to be the most promising option, but no matter how I tried to cast the contents of the ArrayBuffer to a Base64-encoded byte array, I was not able to successfully reproduce a file from the file system in a document library. If anyone out there has any suggestions that might enable readAsArrayBuffer() to work, please let me know in the comments!
- readAsDataURL() – this method returns the contents of the file using the Data URI scheme. Thanks to a handy utility method I found here, I can convert this Base64-encoded string into a JavaScript Uint8Array and use that to populate the SP.Base64EncodedByteArray that the JSOM expects.
Here is the JavaScript I ended up using:
$(document).ready(function ()
{
    // Get the URI decoded host web URL
    // We will use this to get a context here to write data
    hostweburl = decodeURIComponent(getQueryStringParameter("SPHostUrl"));
});

function CreateFile()
{
    // Ensure the HTML5 FileReader API is supported
    if (window.FileReader)
    {
        input = document.getElementById("fileinput");
        if (input)
        {
            file = input.files[0];
            fr = new FileReader();
            fr.onload = receivedBinary;
            fr.readAsDataURL(file);
        }
    }
    else
    {
        alert("The HTML5 FileSystem APIs are not fully supported in this browser.");
    }
}

// Callback function for onload event of FileReader
function receivedBinary()
{
    // Get the ClientContext for the app web
    clientContext = new SP.ClientContext.get_current();
    // Use the host web URL to get a parent context - this allows us to get data from the parent
    parentCtx = new SP.AppContextSite(clientContext, hostweburl);
    parentWeb = parentCtx.get_web();
    parentList = parentWeb.get_lists().getByTitle("Documents");

    fileCreateInfo = new SP.FileCreationInformation();
    fileCreateInfo.set_url(file.name);
    fileCreateInfo.set_overwrite(true);
    fileCreateInfo.set_content(new SP.Base64EncodedByteArray());

    // Read the binary contents of the base 64 data URL into a Uint8Array
    // Append the contents of this array to the SP.FileCreationInformation
    var arr = convertDataURIToBinary(this.result);
    for (var i = 0; i < arr.length; ++i)
    {
        fileCreateInfo.get_content().append(arr[i]);
    }

    // Upload the file to the root folder of the document library
    this.newFile = parentList.get_rootFolder().get_files().add(fileCreateInfo);

    clientContext.load(this.newFile);
    clientContext.executeQueryAsync(onSuccess, onFailure);
}

function onSuccess()
{
    // File successfully uploaded
    alert("Success!");
}

function onFailure()
{
    // Error occurred
    alert("Request failed: " + arguments[1].get_message());
}

// Utility function to remove base64 URL prefix and store base64-encoded string in a Uint8Array
// Courtesy: https://gist.github.com/borismus/1032746
function convertDataURIToBinary(dataURI)
{
    var BASE64_MARKER = ';base64,';
    var base64Index = dataURI.indexOf(BASE64_MARKER) + BASE64_MARKER.length;
    var base64 = dataURI.substring(base64Index);
    var raw = window.atob(base64);
    var rawLength = raw.length;
    var array = new Uint8Array(new ArrayBuffer(rawLength));

    for (i = 0; i < rawLength; i++)
    {
        array[i] = raw.charCodeAt(i);
    }
    return array;
}
This code works!
–mostly.In my environment, Excel Services was able to successfully open my basic test spreadsheet in the browser: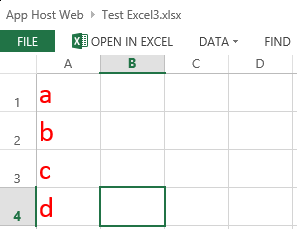
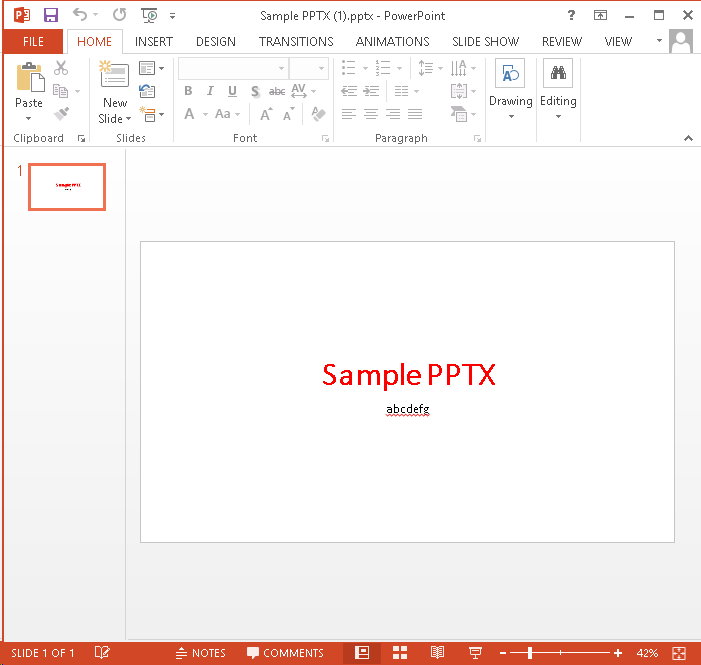
I could also use the Download a Copy option to save local copies and successfully open files of any type:

For a simple Word document, though, I was unable to click the link from the document library and have it open successfully in Word. Instead, Word reported an error when trying to open the document:If you receive the error shown below when opening a document from SharePoint, it is due to “Protected View” in Office 2013. To disable Protected View, follow the steps outlined here.
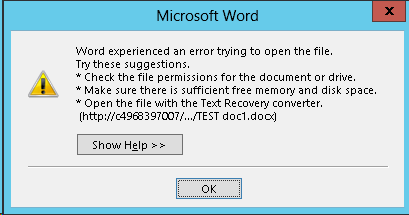
Regardless of your Office 2013 Protected View settings, the Download a Copy option will open the document without the annoying error message.

JavaScript to Conditionally Enable a SharePoint Custom Ribbon Button
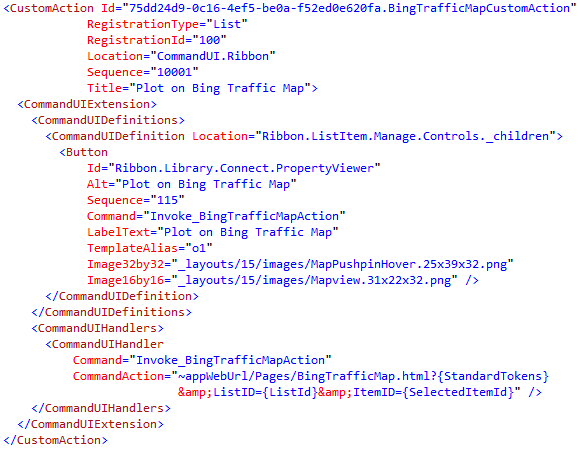
During my session on getting started with apps for SharePoint 2013, I demonstrate how to use the “extension” app shape to define a UI custom action that displays a button in the ribbon. When clicked, this button allows the user to view a Bing traffic map centered at the location specified in the selected list item. This is done using a CustomAction in the same declarative manner as it was done in SharePoint 2010, using the following XML:
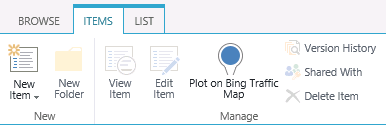
Installing the app adds a button labeled “Plot on Bing Traffic Map” to the “Items” tab on all custom lists in the host web where the app is installed:
In my CommandAction of the CommandUIHandler for the CommandUIExtension I define to create the button, I specify that clicking the button will take the user to the following URL:
~appWebUrl/Pages/BingTrafficMap.html?{StandardTokens}&ListID={ListId}&ItemID={SelectedItemId}Note the use of the SelectedItemId token in the URL above. This means my BingTrafficMap.html page can rightly expect to have an ItemID parameter in its query string, which can then be parsed to get the list item and read its properties using JavaScript.
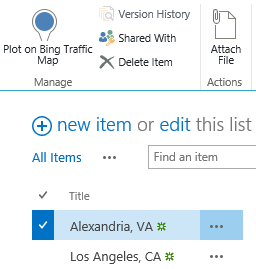
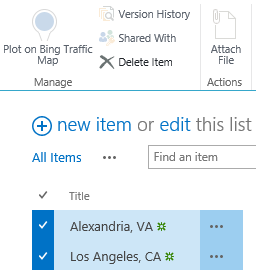
But what if the user hasn’t selected any items? Or multiple items? Since I can only center a map on one single location, I need to have more control over when this button is enabled. In this case, I only want the button to be enabled when exactly one item in the list is selected. (By default, any ribbon buttons you create through custom actions will always be enabled, regardless of whether or not any items are selected.)
As it turns out, there is an EnabledScript attribute of the CommandUIHandler that will enable or disable the button depending on whether the function returns true or false. I was able to adapt this code from Tomasz Rabiński to add the following logic to my CommandUIHandler:

Note that the function EnableDisable–which I can define and then call within the EnabledScript attribute–returns true only if the number of selected items equals 1.
Now my button behaves exactly as I would expect.
No items selected (disabled):
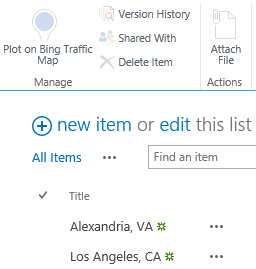
One item selected (enabled):
More than one item selected (disabled):
I have updated my demo code to include this change. You can download this code here.

Get Started with Apps for SharePoint 2013! #SPSVB 2013 Recap
Thanks to everyone who attended my session “Get Started with Apps for SharePoint 2013!” at SPSVB yesterday! We had some great discussions and questions about the new app model for SharePoint 2013, and a few questions came up during the session that I wanted to address in more detail here.
How are apps for SharePoint deployed in a production environment?
We demonstrated how to create a new App for SharePoint project in Visual Studio 2012 (where the app is configured to be automatically deployed to a specific site for debugging). But how do developers hand off an app package for a SharePoint-hosted app to be deployed in production?
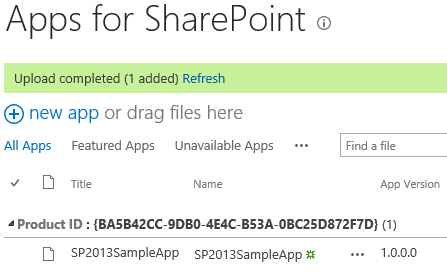
Visual Studio will generate the .app file in an app.publish subdirectory of the bin\Debug, bin\Release, etc. directory of your project. Assuming your system administrators have configured an app catalog site (these are configured at the web application level), anyone with permissions to the Apps for SharePoint library (automatically configured on the app catalog site) can upload the .app file to make the app available to all sites within that web application.
Uploading the file here:

To the library here:
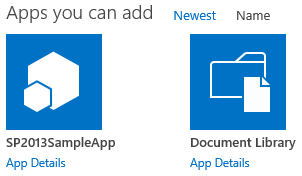
Makes the app available to be installed on any site within the web application:
Olivier Carpentier has also written .NET code and PowerShell scripts to install apps for SharePoint, if that is more your speed.
How do you grant an app the Write right on two or more lists?
In our demo, we had our app request the Write right at the List scope. This corresponds to the following entry in the app’s AppManifest.xml:
When the app is installed, the dialog presented to the user allows the selection of a single list to which the app will be granted Write permissions:
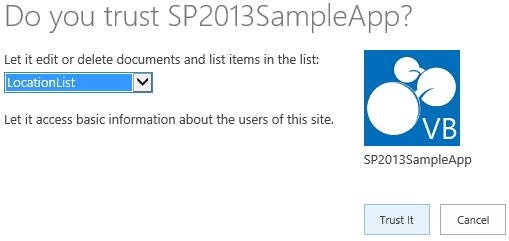
As you can see, however, this dialog only enables me to select a single list. What if we want our app to be able to write to two or more lists? Unfortunately, there is no mechanism to do this right now. If we want our app to be able to write to multiple lists, we must request the right at the next highest scope (in this case, the Web). This corresponds to the following entry in the app’s AppManifest.xml:
Unfortunately, this will grant your app permission to write to all lists within the host web where the app is installed.
How can apps for SharePoint support workflow?
The Workflow object model has been greatly enhanced in SharePoint 2013. Among these enhancements include a client object model (CSOM), JavaScript object model (JSOM), and REST-based APIs for workflow. In a SharePoint-hosted app, the JSOM or REST APIs can be used to access the Workflow object model without any server-side code. You can download sample code for a Workflow-powered app for SharePoint from MSDN.
That said, workflow should only be used in an app for SharePoint when the workflow is integral to the app itself. SharePoint Designer 2013 is the recommended tool for authoring workflows in SharePoint 2013.
Can web part connections be set up on .aspx pages within immersive, full-page apps?
Obviously no server-side code is allowed in a SharePoint-hosted app, but every app must contain at least one page (the app’s Start page). This page may be an .aspx page (referencing server controls, but containing no server-side code). Can we connect web parts on this page? Thus far, I have not been able to do this. I even tried following a similar approach to the one outlined here where the connection between two web parts is provisioned declaratively, but to no avail. If anyone out there can shed any additional light on this question, please feel free to leave a comment!
Slides and code from my session
Code for the sample app I demonstrated can be downloaded here.
In conclusion, thank you!
Thanks again to all the attendees, volunteers, sponsors, speakers, and organizers who continue to make these SPS Events so great, and a special thanks to Microsoft consultant Alex Randall who helped answer many of the questions I had about apps for SharePoint 2013 during and after his session yesterday, When and When Not to Use the New App Model.
Happy app development!
- Our footer