Installing a Let’s Encrypt SSL certificate on Winhost with only a Windows 10 workstation
Author’s note: We will return to our regularly scheduled SharePoint programming soon, but I wanted to share this story for anyone in my shoes who wants to create and install a free Let’s Encrypt SSL certificate in a cPanel/shared hosting environment such as Winhost without direct server access. This is the post I wish I could have found when I started on this journey.
I have hosted this blog on Winhost since 2014. I am a huge fan of their affordable, reliable web hosting and friendly, responsive customer support. However, I am not a fan of paying $39-$49 (or more) per year just to have a simple SSL certificate for a personal blog site.
Let’s Encrypt is a free and automated Certificate Authority (CA) that has major community backing. I am an ardent supporter of their mission and believe we should do everything possible to support “HTTPS everywhere.” Many web hosting providers integrate Let’s Encrypt support right out of the box and if yours is one of them, you need not read any further. However, if you are using a shared hosting provider with a cPanel such as Winhost that is somewhere between lukewarm and slightly hostile toward Let’s Encrypt, do not fear. It is still possible to create and install a FREE SSL certificate for your site.
I would like to add that despite the “slightly hostile” Winhost blog post linked above, Winhost support was extremely helpful with a couple of issues I had during this process. If they were upset with me for not buying my SSL certificate through them, they didn’t let it show. 🙂
Certificate Signing Request (CSR)
When requesting an SSL certificate, you must specify a Certificate Signing Request (CSR). I don’t pretend to fully understand how all of this works, but through this process I have learned that the CSR is based on a public/private key pair generated on the server. Therefore, when using a hosting provider like Winhost you must allow them to generate the CSR and not attempt to generate one yourself (unfortunately, this rules out using alternative methods for getting a free SSL certificate such as gethttpsforfree.com, which requires you to have access to the private key).
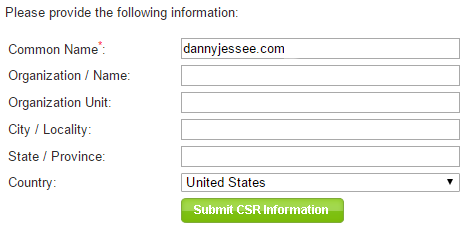
Within your cPanel, navigate to the SSL Manager and click Generate New CSR. Enter the domain name you wish to protect in the Common Name field. After filling in all the fields, press Submit CSR Information.
This will produce output like what you see below:
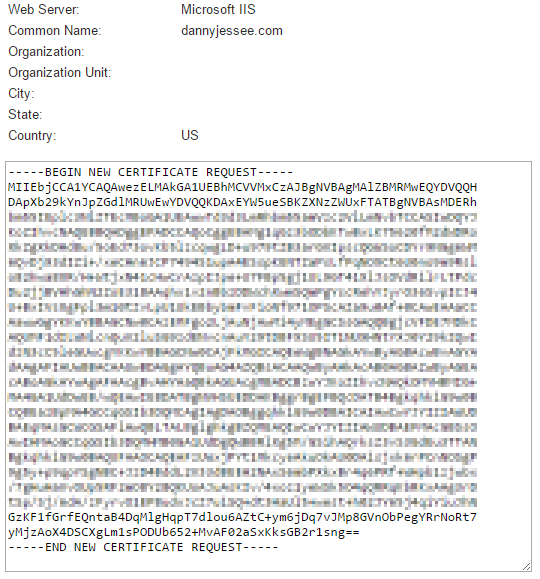
Copy this text into a file on your local workstation. I called mine domain.csr. You will need to reference this file when submitting your certificate request.
Certbot
Let’s Encrypt recommends the use of Certbot to get your certificate. Certbot is only available for UNIX-like operating systems (e.g., Linux and MacOS). If you are running Windows 10, however, you can enable and run a Bash shell on Ubuntu 16.04!
Certbot is used to request the certificate and is especially useful when it can be run directly on the web server. Obviously I could not do this, but fortunately Certbot also offers a “manual mode” that lets you specify the CSR to use when submitting your request and prove ownership of your domain without running it directly on the server where the certificate is to be installed.
After you have followed the steps to get Bash on Windows 10, launch Bash on Ubuntu on Windows and run the following commands to install Certbot:
$ sudo apt-get install software-properties-common

$ sudo add-apt-repository ppa:certbot/certbot

$ sudo apt-get update

$ sudo apt-get install certbot
Once this is complete, you can begin the process of requesting your certificate. The command to run is:
$ certbot certonly --manual --csr
NOTE: Your Windows C: drive is mounted as /mnt/c in Ubuntu.
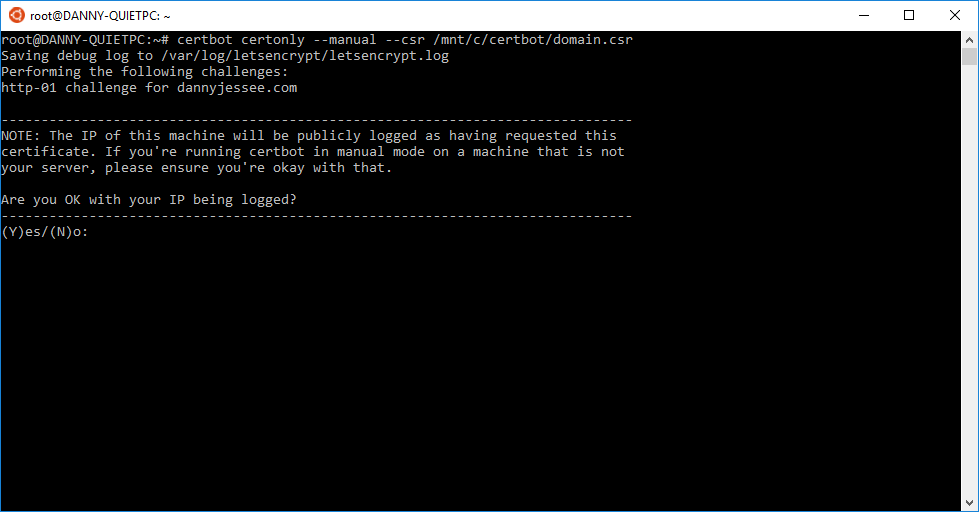
You must consent to your IP being logged in association with this certificate request.
Once that is done, Certbot asks that you prove ownership of the domain for which you are requesting a certificate by serving a specific string of plain-text content from a URL in the /.well-known/acme-challenge subdirectory of your domain.
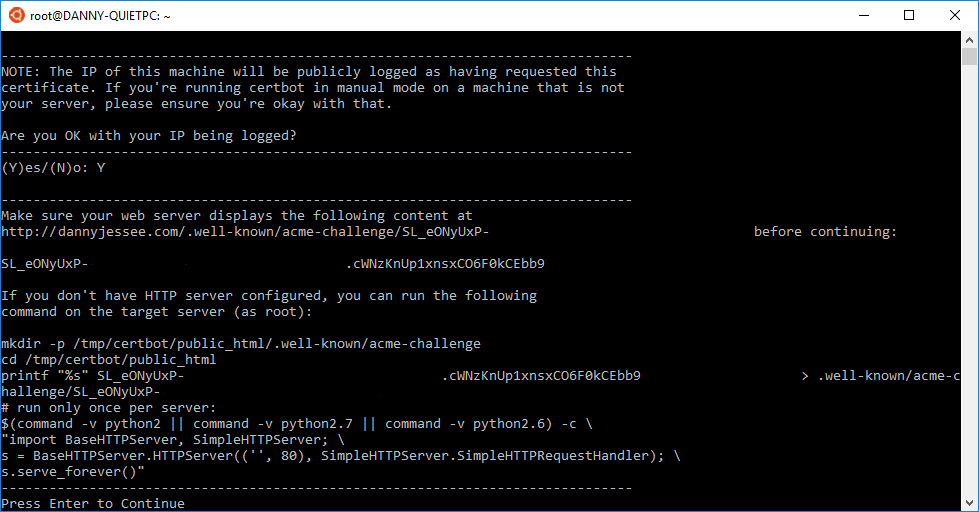
To accomplish this, I created a plain-text file in Notepad and named it according to the URL specified. I pasted in the string of content that is supposed to be served from that URL and uploaded it to the appropriate directory of my web site using FTP. Before pressing Enter, I navigated to the URL to ensure the appropriate content was being served, but I received the following error:

Because the file has no extension and is being served out from IIS, I also need to create a new web.config file in this directory, telling IIS to treat this extensionless file as plain text when serving it out:
After saving and uploading the web.config file, I confirmed that I was serving out the correct content from the specified URL. I returned to my Bash shell and pressed Enter.
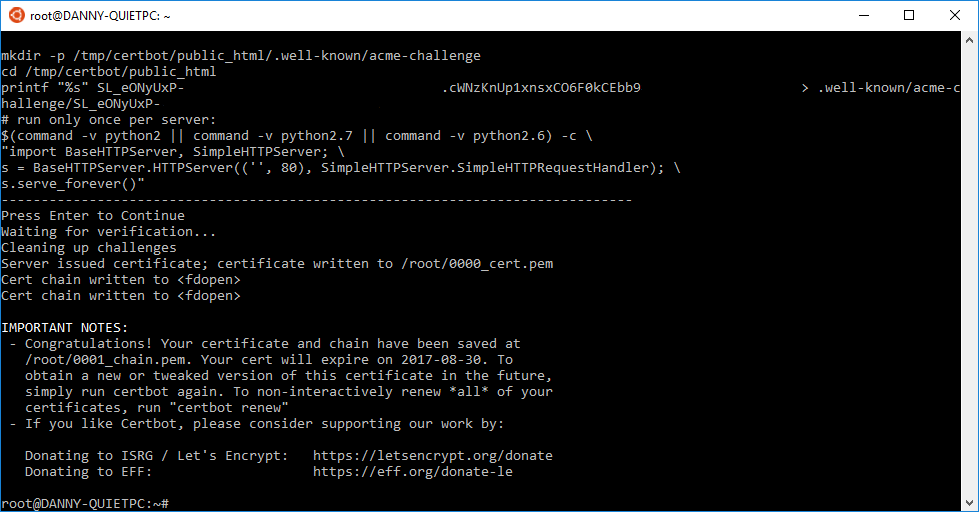
Now that you have proven ownership of your domain, Certbot will request the certificate for your domain and write it out to a .pem file on your workstation.
We can now copy the contents of this file (in this case, 0000_cert.pem) and paste it in our cPanel where it requests the SSL certificate:
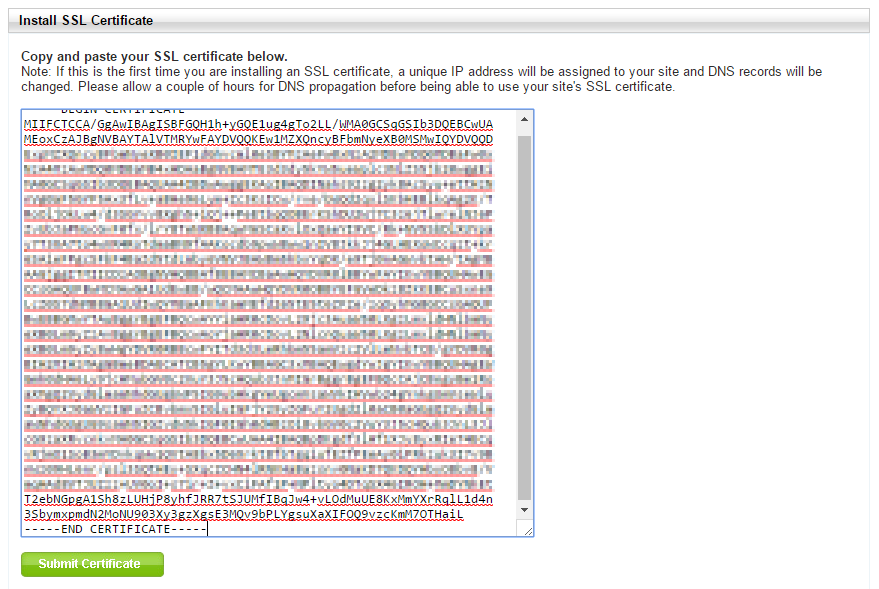
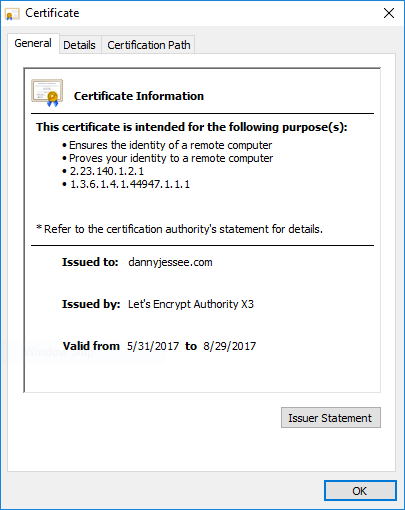
Press Submit Certificate. It took about 20 seconds for me, and you won’t see any fancy success or confirmation messages, but after you are redirected away from this page you can navigate to your site and see that it is secured with the Let’s Encrypt certificate.
![]()
Caveats
There are some caveats worth pointing out below that may not make this the best solution for you.
– At least for Winhost, the CSR you generate can only contain a single Common Name. Unfortunately, you cannot get a certificate that protects both yourdomain.com and yourotherdomain.com, or even yourdomain.com and www.yourdomain.com.
– The certificate expires every 90 days, so you will need to repeat this process to renew the certificate fairly often. This is worth the cost savings, at least for me.
Despite these caveats, I am thrilled to have my free SSL certificate from Let’s Encrypt protecting my Winhost-hosted site and I hope these steps are useful for someone else.
One final author’s note: I am a SharePoint developer by trade and am far from an expert when it comes to web servers and SSL. If I have misstated anything in this post, please leave a correction in the comments and I will update this post. In addition to hopefully being useful, I want to ensure I am being accurate as well. Thanks!