Tagged: 2013
Accessing SharePoint Data from Provider-Hosted Apps: Use the Right Context
I have spent the better part of the last two years working with the new app development model for SharePoint 2013. Recently I have focused on building apps that access, manipulate, and interact with data stored in SharePoint Online with Office 365. If you have done any development using the client-side object model (CSOM) for SharePoint, you understand the importance of instantiating the proper ClientContext object to access data in a particular SharePoint site. The ClientContext constructor takes as an argument the URL of a SharePoint site and allows you to access data stored in the Lists collection of the Web associated with it. In this post, I will discuss the various context objects you should use in your provider-hosted app depending on where the data your app needs to access resides and if the user’s permissions need to be considered. If you have been developing apps for SharePoint for awhile now (and even if you haven’t), I strongly encourage you to use Visual Studio 2013 and the Office Developer Tools for Visual Studio 2013 – March 2014 Update.
Host webs and app webs
When dealing with apps for SharePoint, you will become familiar with host webs and app webs:
- Host web – the SharePoint site to which an app is installed
- App web – the special isolated site (a unique app web is provisioned for each installation of the app) where the app for SharePoint’s internal components and content, such as lists, content types, workflows, and pages, are deployed
Note that a provider-hosted app is not required to have an app web, and in fact may not need one depending on your business requirements.
Your app will always have Full Control permissions to its app web. However, your app will need to request (and be granted) permissions by the user installing your app in order to access data in the host web. This is handled through the app manifest.
If your app needs to access data in the SharePoint site where it is being installed, you will be working with a host web context of some sort. As you will see, there are actually two different host web context objects, depending on the app authorization policy you choose.
Life made easy, thanks to SharePointContext.cs
When you create a new provider-hosted app in Visual Studio 2013, you have the option to create a new ASP.NET Web Forms or MVC application to serve as your app’s remote web application. If you are using the Office Developer Tools for Visual Studio 2013 – March 2014 Update, you also have the option to convert an existing ASP.NET web application to an app for SharePoint project (really cool!) In either case, you will notice that SharePointContext.cs is added to the remote web application project. This file contains class definitions for SharePointAcsContext and SharePointHighTrustContext, which allow you to create host web and app web context objects based on whether your trust broker is ACS (which it is with Office 365) or if you are on premises. I won’t delve into too much more detail in this post, but Kirk Evans has an outstanding writeup about these classes.
Accessing data in the app web
To access data in the SharePoint app web from your app, use the following pattern:
CSOM (C#)
var spContext = SharePointContextProvider.Current.GetSharePointContext(Context);

using (var clientContext = spContext.CreateUserClientContextForSPAppWeb())
{
    Web web = clientContext.Web;
    clientContext.Load(web);
    clientContext.ExecuteQuery();

    ListCollection lists = web.Lists;
    clientContext.Load(lists);
    clientContext.ExecuteQuery();
}
REST (C#)
var spContext = SharePointContextProvider.Current.GetSharePointContext(Context);
HttpWebRequest listRequest = (HttpWebRequest)HttpWebRequest.Create(spContext.SPAppWebUrl + "/_api/web/lists");
listRequest.Method = "GET";
listRequest.Accept = "application/atom+xml";
listRequest.ContentType = "application/atom+xml;type=entry";
listRequest.Headers.Add("Authorization", "Bearer " + spContext.UserAccessTokenForSPAppWeb);
JSOM
var appweburl = decodeURIComponent(getQueryStringParameter("SPAppWebUrl"));
var clientContext = new SP.ClientContext(appweburl);
var appWeb = clientContext.get_web();
var appWebListColl = appWeb.get_lists();
clientContext.load(appWebListColl);
clientContext.executeQueryAsync(onAppWebGetListSuccess, onError);
Accessing data in the host web
To access data in the SharePoint host web (the SharePoint site where your app is installed) from your app, use the following pattern:
CSOM (C#)
var spContext = SharePointContextProvider.Current.GetSharePointContext(Context);

using (var clientContext = spContext.CreateUserClientContextForSPHost())
{
    Web web = clientContext.Web;
    clientContext.Load(web);
    clientContext.ExecuteQuery();

    ListCollection lists = web.Lists;
    clientContext.Load(lists);
    clientContext.ExecuteQuery();
}
REST (C#)
var spContext = SharePointContextProvider.Current.GetSharePointContext(Context);
HttpWebRequest listRequest = (HttpWebRequest)HttpWebRequest.Create(spContext.SPAppWebUrl + "/_api/web/lists");
listRequest.Method = "GET";
listRequest.Accept = "application/atom+xml";
listRequest.ContentType = "application/atom+xml;type=entry";
listRequest.Headers.Add("Authorization", "Bearer " + spContext.UserAccessTokenForSPHost);
JSOM
var appweburl = decodeURIComponent(getQueryStringParameter("SPAppWebUrl"));
var hostweburl = decodeURIComponent(getQueryStringParameter("SPHostUrl"));
var clientContext = new SP.ClientContext(appweburl);
var factory = new SP.ProxyWebRequestExecutorFactory(appweburl);
clientContext.set_webRequestExecutorFactory(factory);
var appContextSite = new SP.AppContextSite(clientContext, hostweburl);
var hostWeb = appContextSite.get_web();
hostWebListColl = hostWeb.get_lists();
clientContext.load(hostWebListColl);
clientContext.executeQueryAsync(onHostWebGetListSuccess, onJSOMError);
Note that using JSOM, we still need to construct a ClientContext for the app web before we generate an AppContextSite for the host web, made possible through the SP.ProxyWebRequestExecutorFactory.
A note about the app-only authorization policy
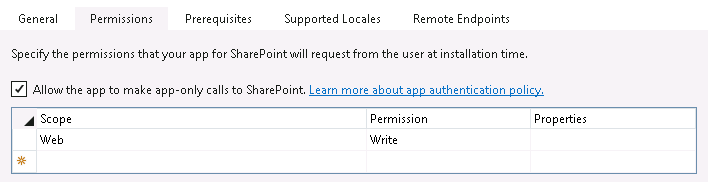
By default, authorization checks in the host web succeed only if both the current user and the app have sufficient permissions to perform the action in question, such as reading from or writing to a list. We are reminded that the user’s permissions are taken into account based on the names of the context and access token objects we use in these scenarios: for instance, CreateUserClientContextForSPHost and UserAccessTokenForSPHost. However, your app has the ability to do something akin to running with elevated privileges using the app-only policy for authorization. Also controlled through the app manifest, the app-only policy is useful when an app doesn’t need or want to consider the permissions of the current user. In Visual Studio 2013, you can specify that your app would like to have the ability to use the app-only policy by checking this box in the AppManifest.xml editor, on the Permissions tab:
That being said, just because your app is granted this permission does not mean that you can use the same host web context or access token as before to automatically leverage it. To access data from the SharePoint host web (taking only your app’s permissions into account and ignoring the current user’s permissions) from your app, use the following pattern:
CSOM (C#)
var spContext = SharePointContextProvider.Current.GetSharePointContext(Context);

using (var clientContext = spContext.CreateAppOnlyClientContextForSPHost())
{
    Web web = clientContext.Web;
    clientContext.Load(web);
    clientContext.ExecuteQuery();

    ListCollection lists = web.Lists;
    clientContext.Load(lists);
    clientContext.ExecuteQuery();
}
REST (C#)
var spContext = SharePointContextProvider.Current.GetSharePointContext(Context);
HttpWebRequest listRequest = (HttpWebRequest)HttpWebRequest.Create(spContext.SPAppWebUrl + "/_api/web/lists");
listRequest.Method = "GET";
listRequest.Accept = "application/atom+xml";
listRequest.ContentType = "application/atom+xml;type=entry";
listRequest.Headers.Add("Authorization", "Bearer " + spContext.AppOnlyAccessTokenForSPHost);
Remember that in order to use the app-only policy, your app must request and be granted this permission by the site owner who installs your app. Also note that there is no JSOM example using the app-only policy because apps that do not make OAuth authenticated calls (such as apps that are only JavaScript running in the app web) cannot use the app-only policy.
As you can see, the code you write in each of the above scenarios (accessing data in the app web, host web, or using the app-only authorization policy) is identical except for the method or property you use from the SharePointContext class to get the appropriate context or access token. Understanding these subtle differences is vitally important when making sure your app has the ability to access and manipulate the SharePoint data it needs.
Enabling custom ribbon buttons dynamically based on multiple selected item values using RefreshCommandUI and JSOM
Updated 9/6/2019: Thanks to Julien for noticing that the CountDictionary() function no longer exists in SharePoint 2016 and beyond. Since SP.ListOperation.Selection.getSelectedItems(context) already returns the collection of selected items, I replaced the call to CountDictionary() with selectedItems.length instead.
Updated 12/23/2014: Thanks to Chris Bell for pointing out some errors in the JavaScript in this post. The script and sample code below have been updated to reflect these corrections.
In this post, I will show you how to use the built-in RefreshCommandUI() method to update the enabled status of a custom ribbon button based on field values in multiple selected list items. In my searching, I have only found examples that changed the enabled status of a custom ribbon button based on a single selected item (I even blogged a very simple example of this here).
For an exhaustive treatment of how to add a custom button to the server ribbon, check out Walkthrough: Adding a Button to the Server Ribbon on MSDN. Our focus in this post is on the CommandUIHandler element of the XML necessary to declare this button, which contains an EnabledScript attribute that contains JavaScript that must return true or false–true if the button should be enabled, false to disable it.
In this example, we set our EnabledScript to “javascript:EnableFinishedButton();” which enables us to declare this function in an external JavaScript file (that we can load via a ScriptLink Custom Action). As an added bonus, this makes our script MUCH easier to locate and debug using our browser’s built-in JavaScript debugging tools! In this example, our EnableFinishedButton function will return true to enable our “Mark As Finished” ribbon button ONLY when ALL selected items in the list (one or more) have a value of “In Progress” in the “Status” field. This example should be easy to adapt to suit your needs.
For completeness, here is the XML necessary to declare the button and associated CommandUIHandler, as well as load the external JavaScript file containing the custom functions we need. While custom ribbon buttons can be deployed in SharePoint-hosted apps, I have packaged this as a farm solution so that I may specify JavaScript functions defined in an external file (loaded via a ScriptLink custom action) for the CommandAction and EnabledScript attributes. As an aside, I strongly encourage you to read Sean McDonough’s post on Custom Ribbon Button Image Limitations with SharePoint 2013 Apps to learn about some interesting (and frustrating!) limitations that forced me to go the farm solution route.
Here are the contents of CustomAction.js, which I am provisioning to the LAYOUTS folder:
function EnableFinishedButton() {
    var context = SP.ClientContext.get_current();
    var list;
    var selectedItems = SP.ListOperation.Selection.getSelectedItems(context);
    var totalSelectedItems = selectedItems.length;

    if (totalSelectedItems > 0) {
        var web = context.get_web();
        context.load(web);
        var listId = SP.ListOperation.Selection.getSelectedList();
        list = web.get_lists().getById(listId);

        // We will use this variable to determine whether EnableFinishedButton() is being called directly or by RefreshCommandUI()
        var hadToMakeCall = false;

        if (typeof this.itemRows == "undefined" || this.itemRows.length != totalSelectedItems) {
            // This will be true if this is the first time an item has been selected in the list OR if the selected items have changed, forcing the need to check again
            hadToMakeCall = true;
            GetItemsStatus();
        }

        // If we just issued the async call, do not enable the button yet
        if (hadToMakeCall) {
            return false;
        }
        else {
            // Once the call has returned, set the enabled status based on the returned value
            return this._can_be_enabled;
        }
    }
    else {
        this.itemRows = undefined;
        return false;
    }

    function GetItemsStatus() {
        // Store the selected list items in an array where their values can be checked
        itemRows = [];

        for (i in selectedItems) {
            itemRows[i] = list.getItemById(selectedItems[i].id);
            context.load(itemRows[i]);
        }

        context.executeQueryAsync(Function.createDelegate(this, onGetItemsSuccess), Function.createDelegate(this, onGetItemsQueryFailed));
    }

    function onGetItemsSuccess() {
        this._can_be_enabled = true;

        // Iterate through all selected items. If one is false, the value of _can_be_enabled will be false and the button will not be enabled
        for (i in itemRows) {
            this._can_be_enabled = this._can_be_enabled && itemRows[i].get_item("Status") == "In Progress";
        }

        // Now we can call the EnabledScript function again
        RefreshCommandUI();
    }

    function onGetItemsQueryFailed(sender, args) {
        alert(args.get_message());
    }
}

function MarkItemsFinished() {
    var context = SP.ClientContext.get_current();
    var web = context.get_web();
    var selectedItems = SP.ListOperation.Selection.getSelectedItems(context);
    var listId = SP.ListOperation.Selection.getSelectedList();
    var list = web.get_lists().getById(listId);
    var i;
    for (i in selectedItems) {
        // Update the "Status" field of each selected item to have a value of "Finished"
        var listItem = list.getItemById(selectedItems[i].id);
        listItem.set_item("Status", "Finished");
        listItem.update();
    }
    context.executeQueryAsync(Function.createDelegate(this, onUpdateItemsSuccess), Function.createDelegate(this, onUpdateItemsFailed));

    function onUpdateItemsSuccess() {
        alert("Items updated!");
    }

    function onUpdateItemsFailed() {
        alert(args.get_message());
    }
}
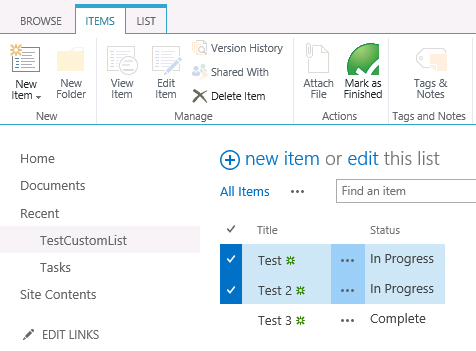
Once deployed, we navigate to our custom list. As long as the items we select have a value of “In Progress” in the “Status” field, the custom button remains enabled:
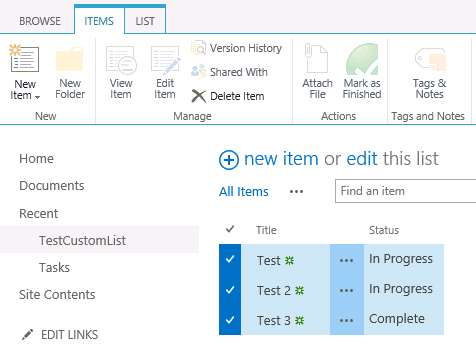
As soon as we select an item that does not have a value of “In Progress” in the “Status” field, the button is no longer enabled:
Download the sample code for this project:
Create a custom SharePoint 2013 Geolocation field using Nokia HERE maps
NOTE: The HERE Maps API for JavaScript 2.x used in the post below will be phased out by September 30, 2015. For more information about the 3.x version, please visit https://developer.here.com/javascript-apis.
Much has been written about the new Geolocation capabilities of SharePoint 2013. If you haven’t already, I would highly recommend reading this overview on MSDN. In short, SharePoint 2013 offers a new field type called Geolocation, which represents point location data (latitude and longitude) that can be automatically plotted on a Bing map.
But what if you want to leverage a different mapping provider, such as Nokia HERE? Fortunately, SharePoint offers the ability to define custom field types based on an existing field type (in this case, SPGeolocationField). Using SharePoint 2013’s new client-side rendering framework, it is possible to define custom rendering logic for your custom field type using JavaScript.
Microsoft provides sample code that allows you to create a Geolocation field that renders using Nokia maps. The custom field type uses JavaScript to render a text box with a search button that performs a geocoding request on the inputted text string using the Nokia Places API. Once a coordinate location has been returned, a HERE map is rendered with a placemark centered on the inputted location. Unfortunately, the sample code has not been updated since February 2013 and a few changes need to be made in order to make use of Nokia’s new HERE mapping platform. If you would like to make use of this sample code, hopefully this post will help you!
Step 1 – Register a HERE developer account
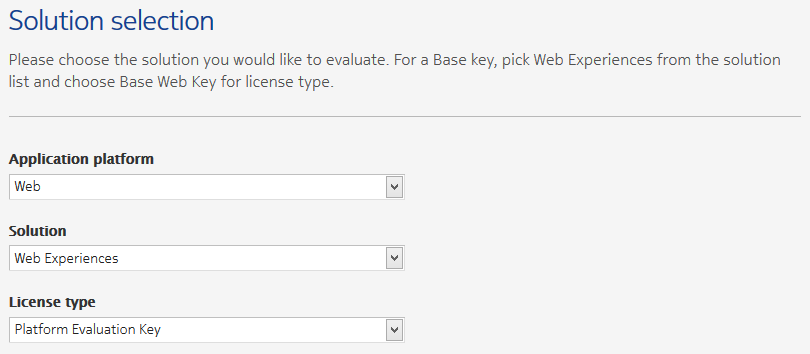
In order to use HERE maps in your application, you need to first sign up for an account on the HERE developer portal. Once you have registered, go to Create app. Specify the following:
Application platform: Web
Solution: Web Experiences
License type: Platform Evaluation Key
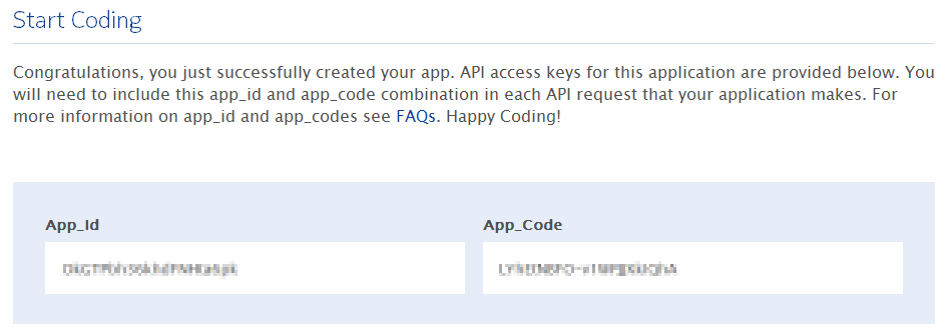
Press Proceed to application details. Specify details about your application, including the Application website URL (the domain name where SharePoint is running). After you provide your contact information and accept the license agreement, you will see a confirmation screen with your App_Id and App_Code values:
Step 2 – Update the sample project
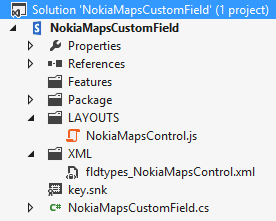
When I first opened the sample project, I was prompted to upgrade it to a SharePoint 2013 solution. After upgrading the project, I had to manually add NokiaMapsControl.js and fldtypes_NokiaMapsControl.xml back to the project (NOTE: These files should be placed directly under the mapped {SharePointRoot}\TEMPLATE\LAYOUTS and {SharePointRoot}\TEMPLATE\XML directories and NOT in subfolders.) The project should now look like this:
Step 3 – Update NokiaMapsControl.js
Make the following changes/updates to NokiaMapsControl.js:
1. In line 1, update the g_appId variable with the App_Id value from your application from the HERE developer portal.
2. In line 2, update the g_authToken variable with the App_Code value from your application from the HERE developer portal.
3. Replace line 138 with the following two lines, which load the new HERE Places API and JavaScript API:
downloadJS('http://js.api.here.com/se/2.5.3/jsPlacesAPI.js');
downloadJS('http://js.api.here.com/se/2.5.3/jsl.js');
4. Update lines 240-241 with the following (the HERE API parameter names have changed from appId and authenticationToken to app_id and app_code, respectively):
nokia.Settings.set("app_id", g_appId);
nokia.Settings.set("app_code", g_authToken);
Step 4 – Build and deploy the project, then add the new field to a list
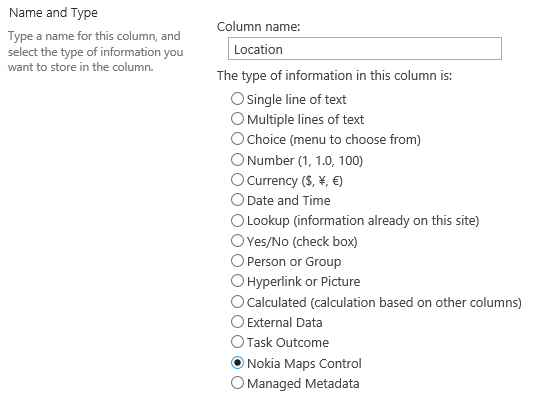
After deploying the project, add a new column based on the custom field type to a list:
Step 5 – Add a new item to the list
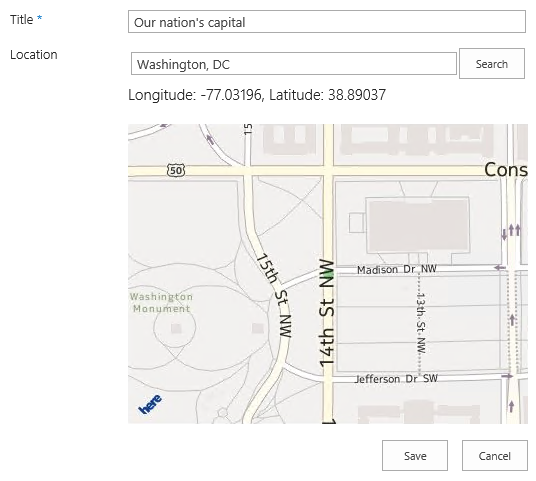
The Nokia Maps Control field renders as a text box with a search button. Enter a location in the text box and press the Search button:

The HERE geocoder service will return a coordinate location for the inputted string, plotted on a HERE map:
Congratulations! You are now ready to use your custom geolocation field with Nokia HERE maps.
You can download a version of the project with all the necessary changes here. Just update lines 1 and 2 of NokiaMapsControl.js with your App_Id and App_Code values and you’ll be good to go!
Set the Bing maps API key in Office 365 using CSOM to leverage SharePoint 2013 Geolocation features
Much has been written about the new Geolocation capabilities of SharePoint 2013. If you haven’t already, I would highly recommend reading this overview on MSDN. In short, SharePoint 2013 offers a new field type called Geolocation, which represents point location data (latitude and longitude) that can be automatically plotted on a Bing map.
In order to take full advantage of the built-in Bing mapping functionality, you must obtain an API key from the Bing Maps portal. Different API key types are available depending on your needs (Trial keys work great for demos and development environments, while Basic or Enterprise keys may better suit your needs in a production environment).
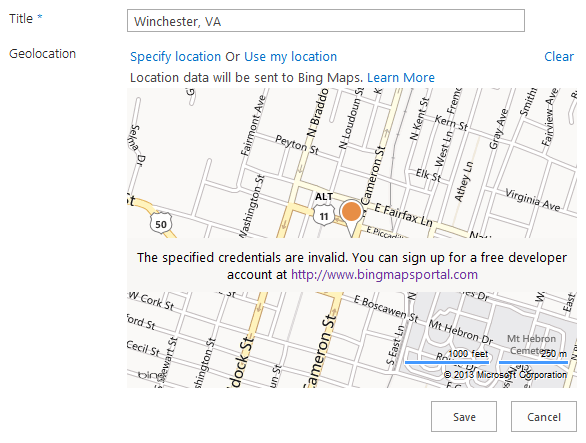
If you attempt to leverage a Geolocation column in SharePoint 2013 (on-premises or in Office 365) without obtaining and setting a Bing Maps API key, you will receive a subtle reminder that you need to do so:
In an on-premises environment, you can use the PowerShell Set-SPBingMapsKey cmdlet to set the Bing maps API key at the farm level. However, it is not possible to use this cmdlet in an Office 365 environment. Fortunately, the Bing maps API key is also stored in the property bag of an SPWeb (with key “BING_MAPS_KEY“). We can set this value via .NET or JavaScript using the client object model.
To set the API key I obtained for my Office 365 site, I used the following code in a simple .NET console application:
        static void Main(string[] args)
        {
            var webUrl = new Uri("");
            using (ClientContext ctx = new ClientContext(webUrl))
            {
                var login = "";
                var password = "";
                var secureStrPwd = new SecureString();
                foreach (char c in password)
                {
                    secureStrPwd.AppendChar(c);
                }

                var creds = new SharePointOnlineCredentials(login, secureStrPwd);
                ctx.Credentials = creds;

                var web = ctx.Web;
                web.AllProperties["BING_MAPS_KEY"] = "";
                web.Update();

                ctx.ExecuteQuery();
            }
        }
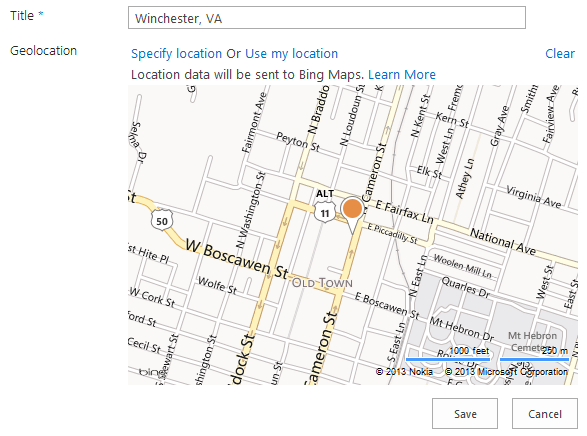
Once the API key has been set, your maps will render without that annoying message!
Using JSOM to write (small) files to a SharePoint 2013 document library
Update 8/24/2017: The code for this app is available for download here.
Update 3/3/2013: Problem solved! The culprit: “Protected View” in Office 2013. Thanks to this blog post from Tobias Lekman, after disabling protected view in each of the Office 2013 applications (I had to update these settings separately in Word, Excel, and PowerPoint), every document I uploaded using the code below opened without any errors on my CloudShare VM.
Update 2/16/2013: The issue I had opening files uploaded into SharePoint described below may not be an issue after all. As it turns out, the CloudShare VM where I was doing my development and testing is generating the same error for ANY document I upload, even “the old fashioned way.” I accessed the same document library from a remote client and the same products that generated errors when being uploaded using the code above opened just fine, without any issues or errors. I will update this post as I learn more about the root cause of this problem.
A recent post on Yammer lamented the lack of examples in the SharePoint 2013 API documentation that use the JavaScript Object Model (JSOM) to do anything more than create a very basic text file in a SharePoint document library.
After lots of digging and a fair amount of trial and error, I now understand why that is the case.
The use case seems simple enough: allow the user to select a file from his or her local machine using an HTML DOM FileUpload object on a form, then use JSOM to upload this file into a document library. It’s certainly easy enough to do using the Client Script Object Model (CSOM). As it turns out, there are a couple of very good reasons why your document upload capability (whether you package it into an app for SharePoint or something else) should NOT leverage JSOM:
- Per MSDN, you can only work with files up to 1.5 MB when using JSOM. It is recommended that you use REST to deal with larger files. (Incidentally, there is a comment in the article on using the REST endpoints that reads “See How to: Complete basic operations using JavaScript library code in SharePoint 2013 for a code example that shows you how to upload a binary file that is smaller than 1.5 MB by using the SharePoint 2013 Javascript object model.” Unfortunately, the only code example in that article creates a very rudimentary plain text file.)
- Unless your browser supports the File APIs introduced in HTML5 (specifically the FileReader API), you are out of luck. As a general rule, browsers will block attempts by JavaScript to access and read files from the local file system for security reasons. If you are using IE, only version 10 supports the FileReader API.
Although I was somewhat discouraged by this news, I was determined to develop an app for SharePoint 2013 that presented a simple file upload control to the user and stored the file in a document library (as long as it was smaller than 1.5 MB, of course). I figured as long as I could save Office documents to the library (i.e., more than a simple plain text file), I would have succeeded.
To accomplish this, I knew I would need to make use of the HTML5 FileReader API. (Because of that, I also knew I would need to test this solution using IE 10, Firefox, or Chrome!) Based on the MSDN documentation, I knew I would be setting the contents of the file by using a new SP.Base64EncodedByteArray. The FileReader API exposes three methods for reading the contents of a file:
- readAsText() – this method reads the plain text contents of a file, but does not properly handle binary files.
- readAsArrayBuffer() – this seemed to be the most promising option, but no matter how I tried to cast the contents of the ArrayBuffer to a Base64-encoded byte array, I was not able to successfully reproduce a file from the file system in a document library. If anyone out there has any suggestions that might enable readAsArrayBuffer() to work, please let me know in the comments!
- readAsDataURL() – this method returns the contents of the file using the Data URI scheme. Thanks to a handy utility method I found here, I can convert this Base64-encoded string into a JavaScript Uint8Array and use that to populate the SP.Base64EncodedByteArray that the JSOM expects.
Here is the JavaScript I ended up using:
$(document).ready(function ()
{
    // Get the URI decoded host web URL
    // We will use this to get a context here to write data
    hostweburl = decodeURIComponent(getQueryStringParameter("SPHostUrl"));
});

function CreateFile()
{
    // Ensure the HTML5 FileReader API is supported
    if (window.FileReader)
    {
        input = document.getElementById("fileinput");
        if (input)
        {
            file = input.files[0];
            fr = new FileReader();
            fr.onload = receivedBinary;
            fr.readAsDataURL(file);
        }
    }
    else
    {
        alert("The HTML5 FileSystem APIs are not fully supported in this browser.");
    }
}

// Callback function for onload event of FileReader
function receivedBinary()
{
    // Get the ClientContext for the app web
    clientContext = new SP.ClientContext.get_current();
    // Use the host web URL to get a parent context - this allows us to get data from the parent
    parentCtx = new SP.AppContextSite(clientContext, hostweburl);
    parentWeb = parentCtx.get_web();
    parentList = parentWeb.get_lists().getByTitle("Documents");

    fileCreateInfo = new SP.FileCreationInformation();
    fileCreateInfo.set_url(file.name);
    fileCreateInfo.set_overwrite(true);
    fileCreateInfo.set_content(new SP.Base64EncodedByteArray());

    // Read the binary contents of the base 64 data URL into a Uint8Array
    // Append the contents of this array to the SP.FileCreationInformation
    var arr = convertDataURIToBinary(this.result);
    for (var i = 0; i < arr.length; ++i)
    {
        fileCreateInfo.get_content().append(arr[i]);
    }

    // Upload the file to the root folder of the document library
    this.newFile = parentList.get_rootFolder().get_files().add(fileCreateInfo);

    clientContext.load(this.newFile);
    clientContext.executeQueryAsync(onSuccess, onFailure);
}

function onSuccess()
{
    // File successfully uploaded
    alert("Success!");
}

function onFailure()
{
    // Error occurred
    alert("Request failed: " + arguments[1].get_message());
}

// Utility function to remove base64 URL prefix and store base64-encoded string in a Uint8Array
// Courtesy: https://gist.github.com/borismus/1032746
function convertDataURIToBinary(dataURI)
{
    var BASE64_MARKER = ';base64,';
    var base64Index = dataURI.indexOf(BASE64_MARKER) + BASE64_MARKER.length;
    var base64 = dataURI.substring(base64Index);
    var raw = window.atob(base64);
    var rawLength = raw.length;
    var array = new Uint8Array(new ArrayBuffer(rawLength));

    for (i = 0; i < rawLength; i++)
    {
        array[i] = raw.charCodeAt(i);
    }
    return array;
}
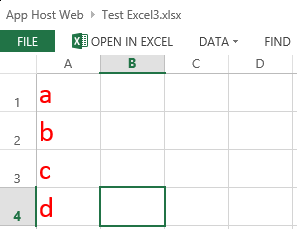
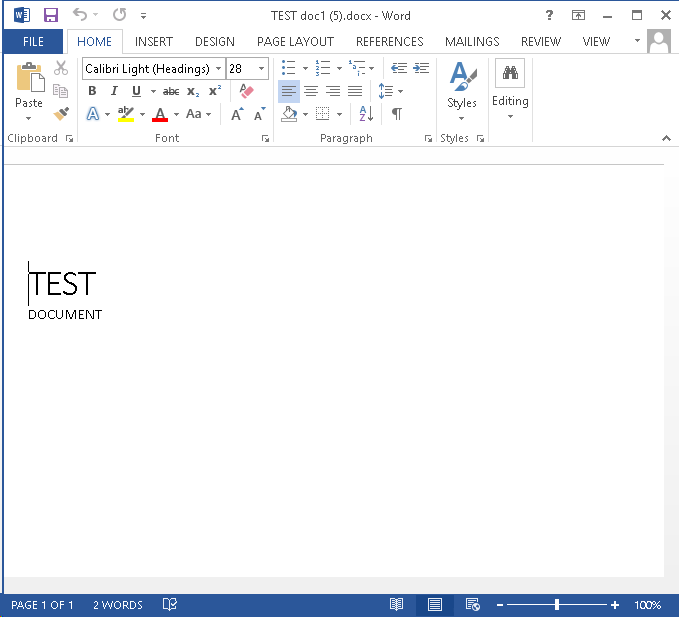
This code works!–mostly. In my environment, Excel Services was able to successfully open my basic test spreadsheet in the browser:
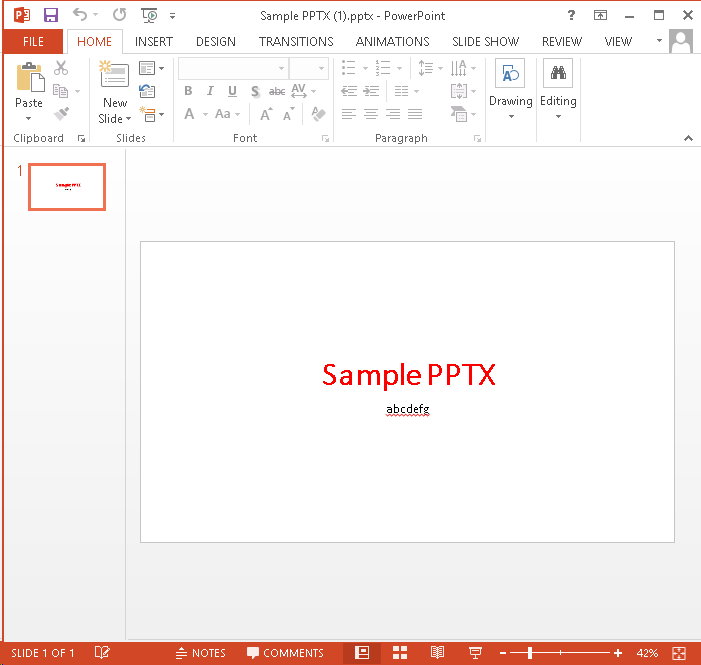
I could also use the Download a Copy option to save local copies and successfully open files of any type:

For a simple Word document, though, I was unable to click the link from the document library and have it open successfully in Word. Instead, Word reported an error when trying to open the document:
If you receive the error shown below when opening a document from SharePoint, it is due to “Protected View” in Office 2013. To disable Protected View, follow the steps outlined here.
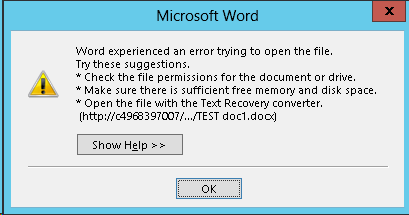
Regardless of your Office 2013 Protected View settings, the Download a Copy option will open the document without the annoying error message.
![]()
Using Azure ACS to Sign In to SharePoint 2013 with Facebook
For those of you who have seen me speak (or read my blog posts) about Claims-based identity, SharePoint 2010, Facebook, and the cloud, you already know that Windows Azure Access Control Service (ACS) can be used to set up identity providers such as Windows Live ID, Google, Yahoo!, and Facebook in SharePoint 2010 through the magic of Claims.
In this blog post, I am pleased to report that all the steps to follow to enable this integration with SharePoint 2010 also work with SharePoint 2013!
For those who are unfamiliar with this integration, I will cover the steps at a high-level below with screenshots from SharePoint 2013. Keep in mind the process to follow is the same for SharePoint 2010.
Prerequisites
- A Facebook account integrated with the Facebook Developers application
- A Windows Azure account with an ACS namespace created (these can be created using the Service Bus, Access Control & Caching section of the portal)
- SharePoint 2013 (might I recommend CloudShare‘s preconfigured SharePoint 2013 RTM Small Farm environment?)
- An X.509 certificate to be used by Azure ACS to digitally sign tokens (and explicitly trusted by SharePoint)
Procedures
Setting up this integration requires configuration steps to be performed in three different places:
- Within Facebook, an application must be created that supports “Website with Facebook Login.”
-
Within the Azure ACS management portal, a new Identity Provider (IP), Relying Party (RP) application, and Rule Group must be created to inform Azure ACS about:
a. The Facebook application created above.
b. The SharePoint environment to be configured with Azure ACS integration below. - Within SharePoint, we must create a new web application with Claims (in SharePoint 2013, Claims is the default authentication mechanism) and configure it to point to our Azure ACS setup as a Trusted Identity Provider.
We must also inform both Azure ACS and SharePoint about the SSL certificate that will be used to sign the SAML tokens containing a user’s claims. This is done by uploading the X.509 certificate into the Azure ACS management portal and telling SharePoint to trust this certificate (via the New-SPTrustedRootAuthority and New-SPTrustedIdentityTokenIssuer cmdlets which we will execute later on). In a demonstration environment, I use a self-signed certificate made via the makecert command. In production, you would obviously want to use a legitimate SSL certificate.
Facebook Application Setup
Within the Facebook Developers application, click Create New App.

Give the app a Name and a Namespace. Click Continue.
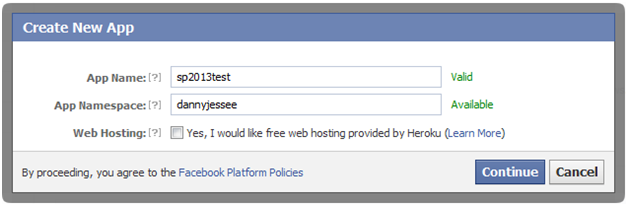
After passing the Captcha check, select Website with Facebook Login in the next screen and enter the URL to your Azure ACS Service Namespace (e.g., https://{your namespace}.accesscontrol.windows.net). Click Save Changes.
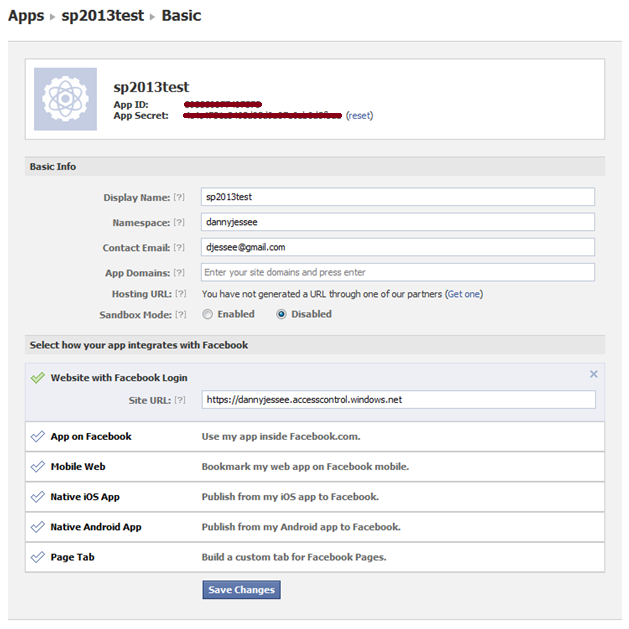
Take note of the App ID and App Secret values that appear at the top of this screen. You will need to use these to configure Azure ACS to leverage this application. That’s all we need to do within Facebook!
Azure ACS Setup
Within Azure ACS, we must configure the following four things:
- Facebook as an Identity Provider.
- SharePoint as a Relying Party Application.
- Claims Rule Groups to determine how Claims are passed from the identity provider to the relying party application.
- The Token Signing Certificate that Azure ACS will use to prove that it is indeed the issuer of the SAML token that SharePoint receives.
Identity Provider
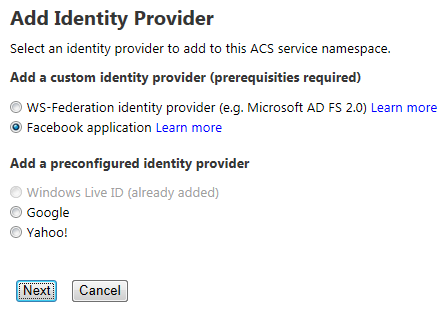
From within your Azure ACS management portal (e.g., https://{your namespace}.accesscontrol.windows.net) and select Identity providers from the Trust relationships section in the left navigation. In the next screen, click Add.

In the next screen, choose Facebook application and click Next.
In the next screen, enter the Application ID and Application secret values from the Facebook application you created above. You should also provide a Display name (for use within the ACS management portal) and a comma-separated list of Application permissions (note that email is the only required permission to enable Facebook users to sign in to SharePoint). You can, however, request additional permissions to do lots of fun and exciting things. Those permission strings are defined here.
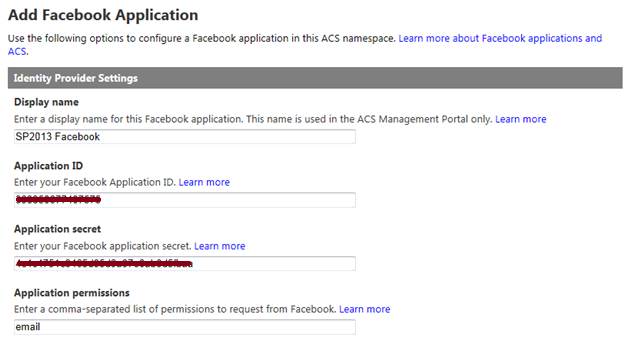
You do not need to specify values for Login link text or Image URL unless you plan to configure more than one Azure ACS identity provider to use with SharePoint. If you have already configured your Relying party applications within Azure ACS, you may select them at the bottom of this screen. Otherwise, we will configure SharePoint as an RP in the next step.
Press Save to save changes.
Relying Party Application
From within your Azure ACS management portal (e.g., https://{your namespace}.accesscontrol.windows.net) and select Relying party applications from the Trust relationships section in the left navigation. In the next screen, click Add.

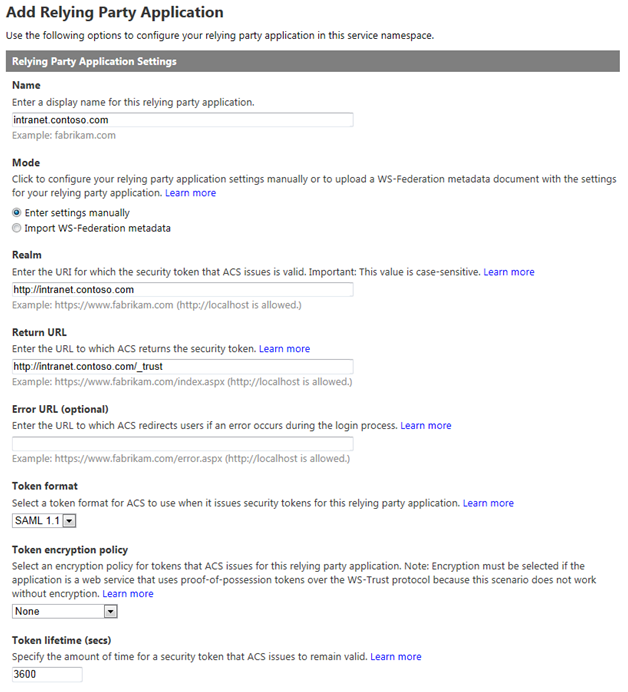
In the next screen, provide a name for the relying party application (I often just use the fully-qualified domain name of my SharePoint web application) and choose to Enter settings manually. In the boxes below, enter the following values:
- Realm – URL of your SharePoint web application (note that a URN can also be entered here and, in many cases, is the preferred approach)
- Return URL – URL of your SharePoint web application + /_trust – this is the endpoint for SharePoint’s STS, which is where Azure ACS will send the SAML token it creates
- Token format – SAML 1.1
- Token lifetime – enter a value greater than the default 600 seconds (Wictor Wilen gives a great explanation why here)
In the Authentication Settings section, select the Identity provider you configured above and choose to Create a new rule group. Under Token Signing Settings, choose whether to Use service namespace certificate (if you have already configured a certificate within Azure ACS) or Use a dedicated certificate if you would like to use a different X.509 certificate exclusively for this relying party application.
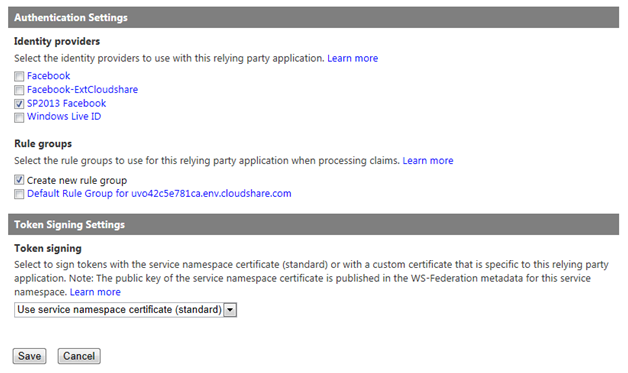
Click Save to save changes.
Rule Group
From within your Azure ACS management portal (e.g., https://{your namespace}.accesscontrol.windows.net) and select Rule groups from the Trust relationships section in the left navigation. In the next screen, click Default Rule Group for {your web application}.
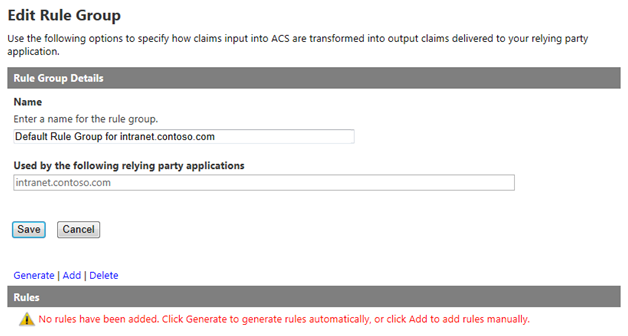
Note that no rules are added by default. Click Generate and select the identity provider you created above.
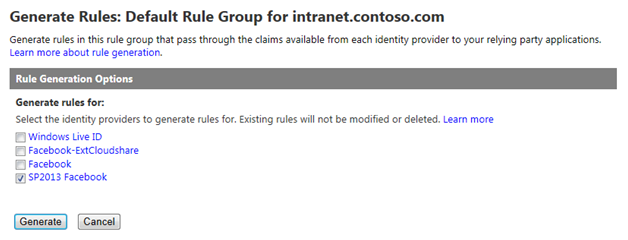
Click Generate to generate Claims rules for the 5 values Azure ACS can obtain from a logged in Facebook user:
- AccessToken – the Facebook Graph API access token
- emailaddress – the email address associated with the user’s Facebook profile
- expiration – the expiration date/time of the AccessToken granted above
- name – the Facebook user’s display name
- nameidentifier – the Facebook user’s unique profile ID (integer)
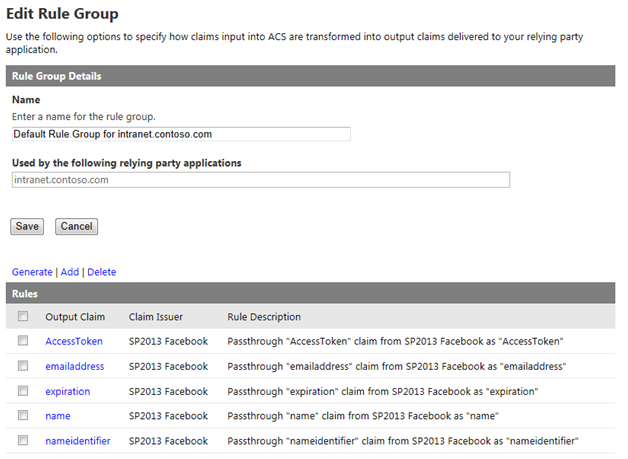
Press Save to save the rules.
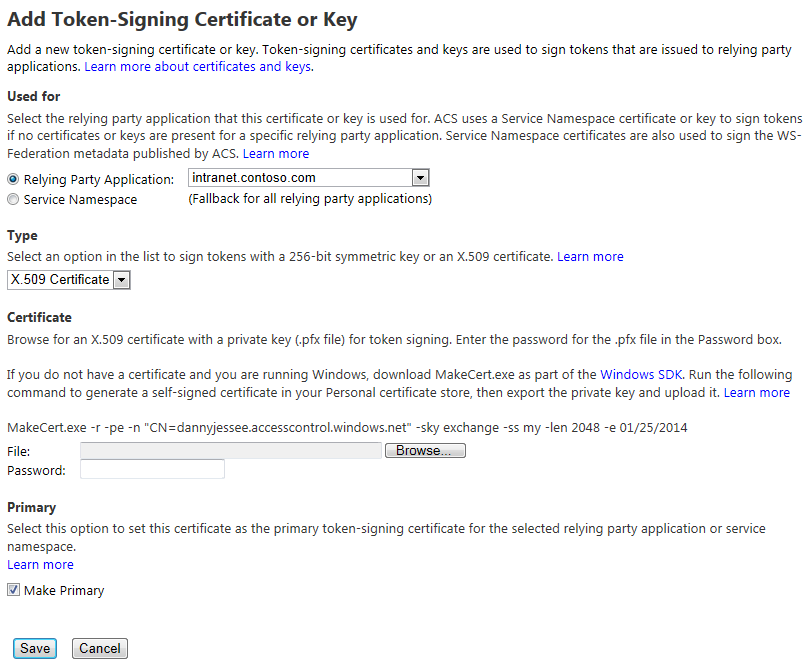
Upload Token Signing Certificate
If you haven’t already, you will need to configure Azure ACS to utilize an X.509 certificate to digitally sign the tokens it generates. Optionally, you can also specify certificates to use for token encryption and decryption. For the purposes of this demonstration, I generated a self-signed certificate using the makecert utility. DO NOT DO THIS IN PRODUCTION! I then uploaded this certificate by going to the Certificates and Keys link under Service settings in the ACS management portal.
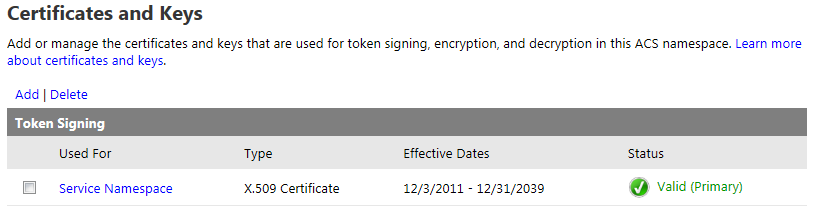
Click Add to upload your certificate. This page allows you to specify where the certificate should be used, what type of certificate it is, and how to make it the primary token-signing certificate. It even includes the specific makecert command you need to run to generate a self-signed certificate (again, I cannot overemphasize how important it is that you NOT use a self-signed certificate in production!)
That’s all we need to do within Azure ACS!
SharePoint 2013 Setup
Within SharePoint, we must do the following:
- Create a new web application using Claims-based authentication (the default mechanism in SharePoint 2013).
- Configure Azure ACS as a new Trusted Identity Provider for that web application and tell SharePoint to trust the certificate Azure ACS uses to sign its SAML tokens.
- Set a User Policy within the web application to allow users who log in via the Trusted Identity Provider to have access to the site.
New Web Application
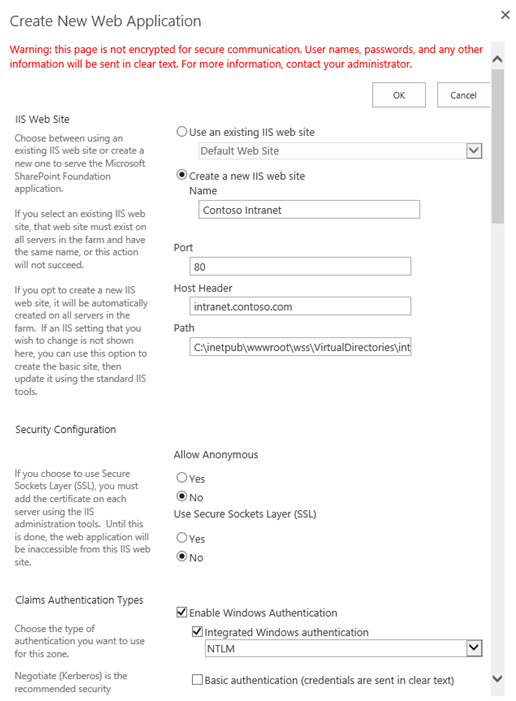
From SharePoint 2013 Central Administration, create a new web application. Unlike SharePoint 2010, SharePoint 2013 does not prompt you to choose between Classic and Claims-based authentication. Claims is the default (hooray)!
Make sure the host header matches the host header for the Return URL specified in the Azure ACS relying party application setup. Enable Integrated
Windows Authentication with NTLM at this step. You’ll notice no Trusted Identity providers exist at this point.
Enjoy the friendly new progress messages in SharePoint 2013:

Create a new site collection at the root of the web application and choose a Windows identity for the primary Site Collection Administrator.
Configure Azure ACS as a new Trusted Identity Provider
In order to enable us to select Azure ACS as a trusted identity provider for the web application, we need to run some PowerShell. The script to run appears below.
$realm = "http://intranet.contoso.com"
$signinurl = "https://dannyjessee.accesscontrol.windows.net:443/v2/wsfederation?wa=wsignin1.0&wtrealm=http%3a%2f%2fintranet.contoso.com%2f"
$certloc = "C:\dannyjessee.cer"
$rootcert = Get-PfxCertificate $certloc
New-SPTrustedRootAuthority "Danny Jessee Azure ACS" -Certificate $rootcert
$cert = New-Object System.Security.Cryptography.X509Certificates.X509Certificate2($certloc)
$map1 = New-SPClaimTypeMapping -IncomingClaimType "http://schemas.xmlsoap.org/ws/2005/05/identity/claims/emailaddress" -IncomingClaimTypeDisplayName "Email" -SameAsIncoming
$map2 = New-SPClaimTypeMapping -IncomingClaimType "http://schemas.xmlsoap.org/ws/2005/05/identity/claims/name" -IncomingClaimTypeDisplayName "Display Name" –LocalClaimType "http://schemas.xmlsoap.org/ws/2005/05/identity/claims/givenname"
$map3 = New-SPClaimTypeMapping -IncomingClaimType "http://www.facebook.com/claims/AccessToken" -IncomingClaimTypeDisplayName "Access Token" -SameAsIncoming
$map4 = New-SPClaimTypeMapping -IncomingClaimType "http://schemas.xmlsoap.org/ws/2005/05/identity/claims/nameidentifier" -IncomingClaimTypeDisplayName "Name Identifier" –LocalClaimType "http://schemas.xmlsoap.org/ws/2005/05/identity/claims/upn"
$map5 = New-SPClaimTypeMapping -IncomingClaimType "http://schemas.microsoft.com/ws/2008/06/identity/claims/expiration" -IncomingClaimTypeDisplayName "Expiration" -SameAsIncoming
New-SPTrustedIdentityTokenIssuer -Name "Facebook" -Description "Facebook" -Realm $realm -ImportTrustCertificate $cert -ClaimsMappings $map1,$map2,$map3,$map4,$map5 -SignInUrl $signinurl -IdentifierClaim $map1.InputClaimType
This script performs the following actions:
- Establishes a trust relationship between SharePoint and the Azure ACS token signing certificate (this is the equivalent of going to Security > Manage trust and uploading this certificate in Central Administration).
- Sets up the claim rules to pass the claims returned from Azure ACS to the SharePoint STS at the _trust endpoint (in some cases, these claims need to be mapped to different claim type URIs to avoid collisions with claims provided by the SharePoint STS).
- Creates a new trusted identity provider associated with the appropriate realm, certificate, claims mappings, and sign in URL (this value can be obtained by going to Application integration under Development in the Azure ACS management portal, then selecting Login pages).
Some things to keep in mind as you modify this script to run in your environment:
- Ensure the value for $realm matches the realm value used when creating the relying party application within Azure ACS.
- Ensure the X.509 certificate used here is the same as the token signing certificate used when creating the Relying Party application within Azure ACS.
- Ensure the value for $signinurl is set properly for your SharePoint web application.
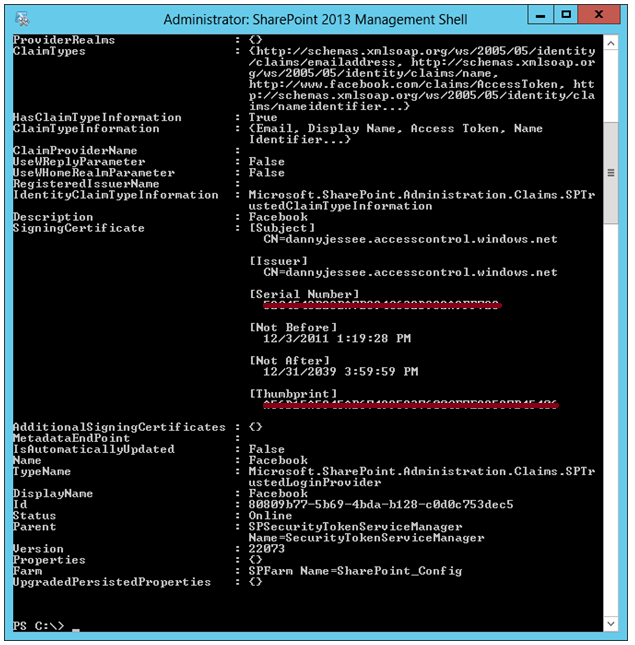
Run this PowerShell script from the SharePoint 2013 Management Shell (as an Administrator). If you don’t see red text, you’re doing alright!
Return to the list of web applications in SharePoint 2013 Central Administration. Select the web application and press Authentication Providers.
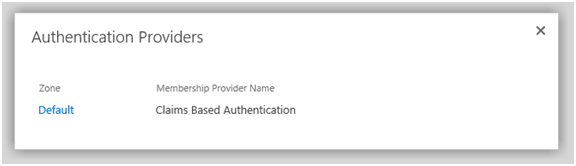
Choose the appropriate zone and scroll down. Facebook should now appear in the list of trusted identity providers:
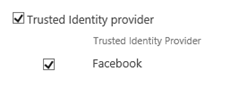
Select Facebook and press Save. You have now configured Azure ACS as a new trusted identity provider, and SharePoint knows it can trust SAML tokens signed with your Azure ACS token-signing certificate.
Set User Access Policy
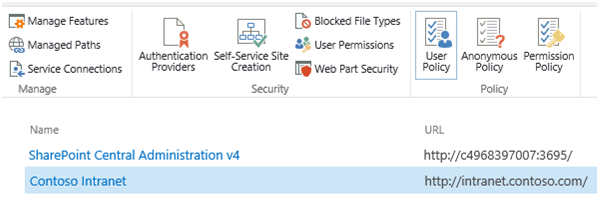
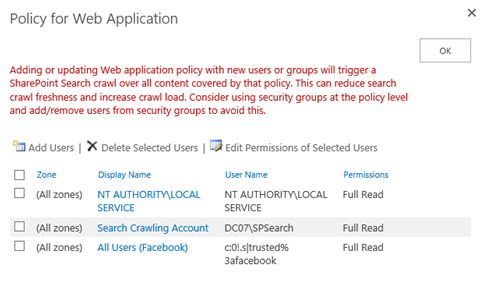
In order for users to access your SharePoint 2013 site once they have authenticated via Facebook, we must grant them the appropriate level of authorization. To do this, I recommend setting a “Full Read” policy for all users who authenticate to SharePoint via our “Facebook” trusted identity provider. Start by selecting the web application in Central Administration and go to User Policy.
Choose Add Users, then select the appropriate zone (All zones) and press Next.
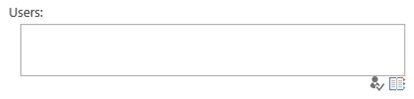
Select the address book icon beneath the Users text box to bring up the Select People and Groups dialog.
Select All Users, then choose All Users (Facebook). Press Add to select the group.

Check the box for Full Read in the permissions section and press Finish.

The new policy is now displayed at the bottom of the list.
With that, our SharePoint configuration is complete! We are now ready to have our users sign in to SharePoint 2013 with Facebook.
Signing in to SharePoint 2013 with Facebook
Navigate to the home page of the web application. The default sign in page will appear.
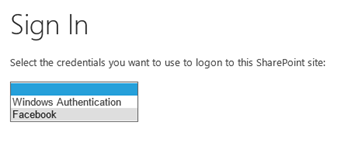
Choose Facebook from the drop down list. The user will be redirected (through the Azure ACS portal) to a Facebook-hosted login page.
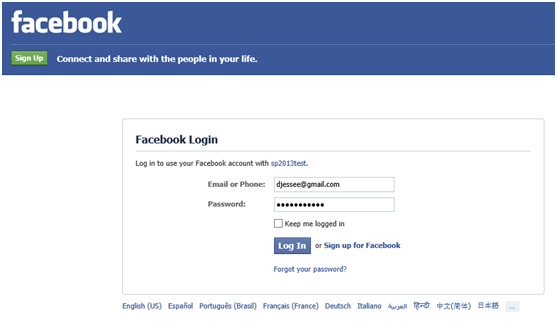
Enter your Facebook credentials and press Log In. The first time a user attempts to log in to your SharePoint site with Facebook, he or she will be prompted to grant the Facebook application access to the user’s basic information and email address (this is based on the permissions we set up when we initially defined the Facebook identity provider in the Azure ACS management portal).
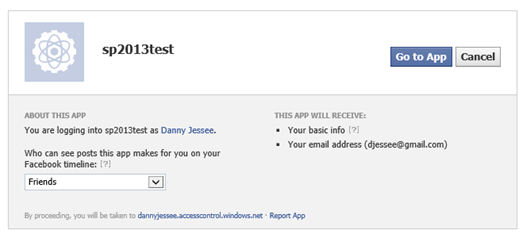
Press Go to App. The user should be redirected back to Azure ACS, which then redirects the user back to SharePoint…logged in with Facebook credentials!

Note the user’s display name is the email address associated with the user’s Facebook account. This is because we set EmailAddress as the IdentifierClaim in the PowerShell script we ran to configure Azure ACS as a trusted identity provider.
I know this is a TON of information to put in a single blog post, so feel free to post any questions in the comments!