Tagged: FBA
Using Claims Authentication to Configure Multiple Authentication Providers in a CloudShare Environment
This post originally appeared in the CloudShare Community Blog on October 25th.
CloudShare’s very own Chris Riley recently shared an environment of mine in a blog post about network orchestration. This environment leverages some exciting new capabilities in SharePoint 2010: namely Claims Authentication in a SharePoint 2010 web application and the ability to configure multiple authentication providers in a single zone. These technologies offer exciting prospects to anyone who previously had to configure separate host headers and URLs for different extranet customers, depending on the mechanism required for each subset of users to log in.
How does this look to end users? To see Claims in action, fire up the “SharePoint 2010 (Clean Installation)” image from the shared environment, open Internet Explorer and navigate to http://intranet.contoso.com.
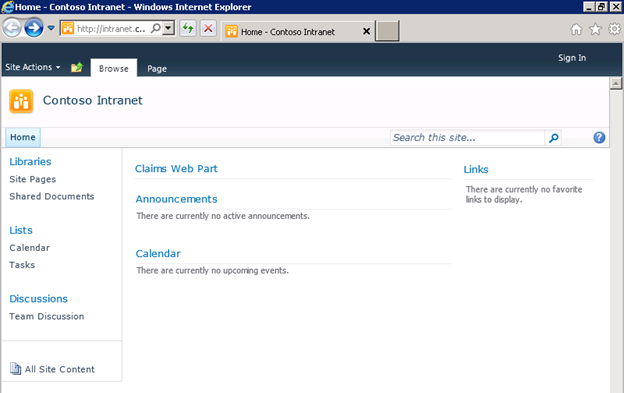
You’ll see an empty Team Site with a “Claims Web Part” at the top. Since anonymous access to the site is enabled, the Claims Web Part will initially be empty.

Press the “Sign In” link at the top right of the page. The page that appears, http://intranet.contoso.com/_login/default.aspx, is new in SharePoint 2010 and allows users to choose from all the different authentication providers configured for that web application. (As a side note, there are some exciting opportunities for custom code development here, including the ability to automatically redirect users to a specific authentication provider based on parameters such as their IP address, bypassing this page of options entirely! After all, not all end users are going to appreciate the distinction between “Windows Authentication” and “Forms Authentication.”)
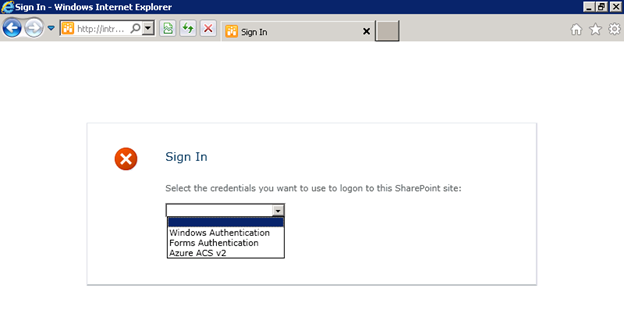
In this web application, I have configured the following providers:
- Windows Authentication – standard NTLM credentials.
- Forms-Based Authentication (FBA) – you may remember this option from MOSS. In this environment, I have created a custom membership provider that validates inputted credentials against a SQL Server database. In practice, FBA can be used to authenticate external users against Active Directory or any other account database.
- Azure Access Control Services (ACS) v2 – allows users to log in with credentials from Open ID providers such as Windows Live ID and Facebook.
For a more in-depth read about how to configure Azure ACS v2 as an authentication provider in SharePoint, including adding other Open ID providers such as Google and Yahoo, check out this blog post by Travis Nielsen.
If I choose Azure ACS v2 (this can be given a friendlier name when you set it up as a Trusted Identity Provider through PowerShell), I will see the following screen. Claims Authentication relies on a series of HTTP redirects to seamlessly direct users between SharePoint and external trusted identity providers such as Azure ACS to log them in. This page is hosted completely outside of my SharePoint environment:
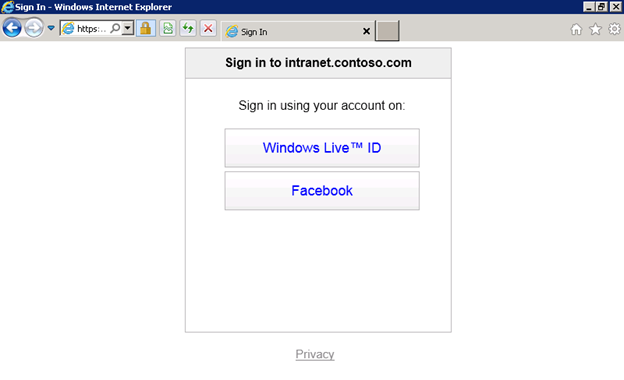
By choosing “Windows Live ID,” I will be redirected to https://login.live.com, where I will be prompted to enter my Windows Live ID credentials. (Similarly, you will be redirected to any of the other Open ID providers’ sites should you choose them instead.) After I sign in, another series of HTTP redirects takes place that eventually lands me back in my SharePoint environment, all logged in. The Claims web part on the page shows the various Claims that were sent by the Trusted Identity Provider in an XML-based Security Assertion Markup Language (SAML) token back to SharePoint:
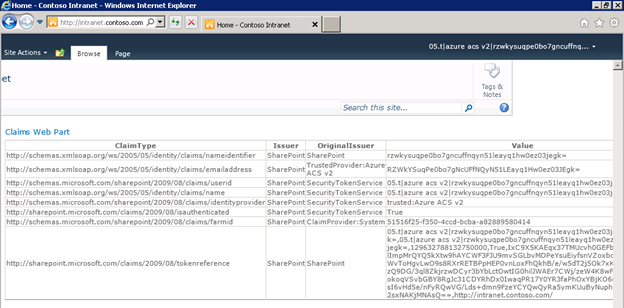
As an application developer, I can leverage these Claims (you see some examples of Claims in the screenshot above include nameidentifier, emailaddress, userid, name, etc.) to make various authorization (what resources may this authenticated user access) and personalization (how is this particular user or class of user’s experience customized) decisions about how to handle this user.
Claims-based authentication and Azure ACS offer exciting possibilities to application developers who are liberated from having to maintain (or even worse, design and develop!) a user management system and all the nightmares that go along with it (think about password resets, forgotten passwords, security requirements for maintaining account information, etc.) As Chris mentions in his blog post, the same paradigm can be applied using Active Directory Federation Services (AD FS v2) to support users logging in to a SharePoint environment using credentials from a trusted external domain.
That said, Claims-based authentication is not always as easy to set up and work with as it may seem. Using CloudShare, developers and IT professionals can focus their valuable time and energy on solving the issues surrounding the implementation of Claims-based identity in SharePoint 2010 and not be concerned with software licensing, hardware, or other infrastructure concerns.
A Checklist for New Forms-Based Authentication Users in SharePoint 2010
In recent weeks, I have done a fair amount of analysis and testing of various Claims-Based Identity scenarios in SharePoint 2010. One of these scenarios involves a web application configured to use Forms-Based Authentication (FBA obviously requires the use of Claims in SharePoint 2010) that is tied to a custom membership provider. The membership provider is quite simple, storing user IDs and passwords in a table within a SQL Server database (in plain text, so please don’t do this in production!) The solution was initially developed in MOSS 2007 and then migrated to SharePoint 2010. I have not yet performed a Visual Upgrade, which is why my screenshots still look “MOSS-y.”
There are numerous primers out there that explain how to handle the migration of existing FBA users to their Claims-based counterparts in SharePoint 2010, but what happens when you add new users to the custom membership database after the migration? Does everything go smoothly? In my experience, there are a few steps you should always perform to ensure all new users added to the membership database have the end-user experience you would expect.
First, I will create a new user and show you what may happen if you take no further action.
Step 1: Create the New User
This procedure will vary based on your custom membership provider. In this example, I will create the user example in my database table with an equally secure password (again, please don’t do this in production!)
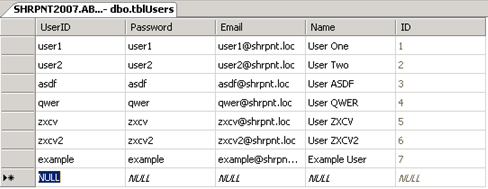
What if I did nothing further at this point? Should the user example be able to log in to the FBA-protected site if he or she has not been explicitly granted any access (and when “All Authenticated Users” has not been granted any level of access to the site)? The answer may surprise you…
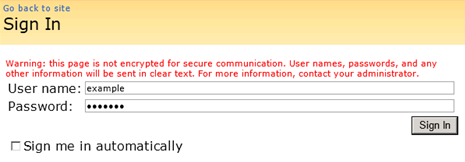
I’m in!
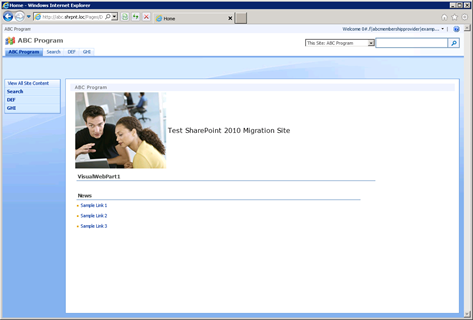
We’ll deal with this little bit of nonsense (the ugly Claims-encoded welcome name for the new user) in a minute. By the way, does anyone else find it amusing that the last two characters of the user’s display name are dropped in favor of a three character ellipsis (…)?

What’s even “better” is that example can click “View All Site Content” and navigate to all the lists and libraries within the site.
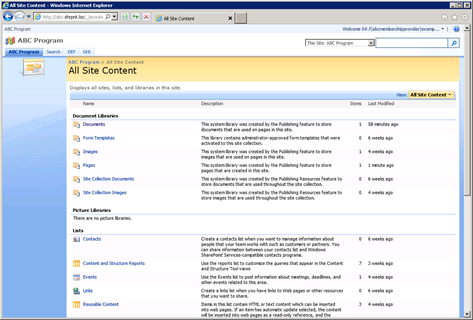
This does not seem like the behavior we would expect to see. How can we clean things up?
Step 2: Create an SPUser Object for the New User
In my initial quest to learn why a new FBA-user’s welcome name is always in Claims-encoded format, I stumbled upon Tyler Holmes’ excellent blog post entitled Awkward Usernames Courtesy of Claims Authentication (FBA). This led me to realize that I needed to update the DisplayName property of the SPUser object associated with the new user. Unfortunately, when I tried to run the PowerShell cmdlet Tyler provides, I found out that my new user doesn’t even have an associated SPUser object yet!
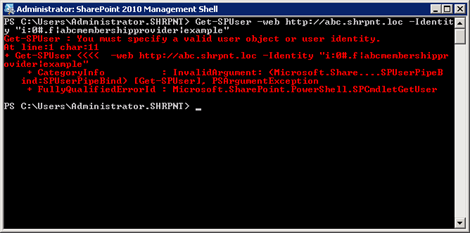
To create this object for my new FBA user, I run the following cmdlet:
New-SPUser -Web http://abc.shrpnt.loc -UserAlias “i:0#.f|abcmembershipprovider|example”

Before I run Tyler’s cmdlet to set the DisplayName for my SPUser to a friendlier value (although I now see example as the user’s name rather than its Claims-encoded equivalent), I thought I’d try logging in as example again to see if having an SPUser object for my new user makes a difference.
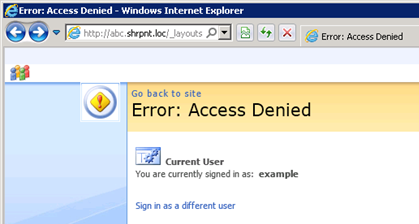
Access Denied?! But all I did was create a security principal (SPUser) for my new FBA user, I didn’t change any permissions…
Naturally this is the behavior one would expect to see when a new user is created and has not yet granted access to any resources. It’s a new FBA user (without a security principal)’s ability to have reader access across a site that has me more troubled.
Step 3: Grant the New User the Appropriate Level of Access
Unless you have assigned “All Authenticated Users” with a certain level of access to the site, you will experience the Access Denied error shown above. Just as in any other SharePoint deployment, a user with the appropriate level of access should assign the new user (either through a SharePoint group or directly) the permissions he or she will need on the site.
After this has been done, example is able to log in to the site once again. As an added bonus, example‘s welcome name at the top right of the page is no longer in Claims-encoded format.
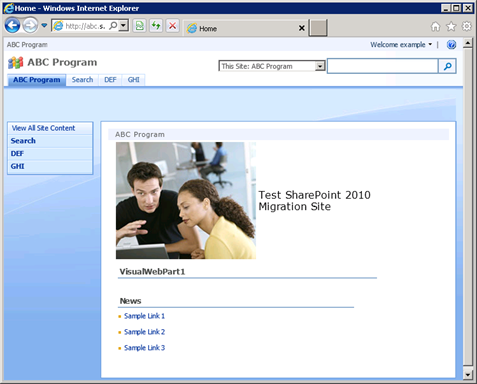
Step 4: Set the New User’s DisplayName Value
When I created the user example in Step 1, I gave the user a name of Example User. I can run the following in PowerShell to set the user’s display name accordingly:
$user = Get-SPUser -Web http://abc.shrpnt.loc -Identity “i:0#.f|abcmembershipprovider|example”
$user.DisplayName = “Example User”
$user.Update()

This step is absolutely necessary if you do not use LDAP or BCS to map user profile properties to your custom membership provider’s data store. (Conversely, if you do use LDAP or BCS and have user profile synchronization configured, the value you set in this step will be overwritten the next time profile synchronization occurs.)
Now when example logs in, we see the new welcome name.
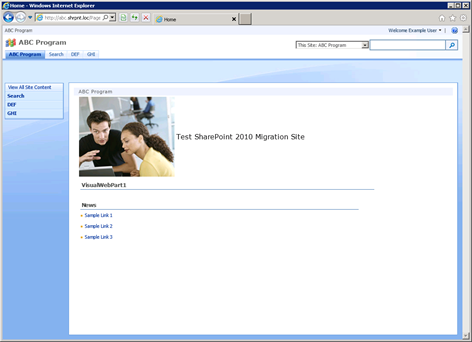

It’s worth noting that nothing within the infrastructure of Claims itself has anything to do with the user’s welcome name or how it is displayed. In fact, using the Claims Viewer Web Part, we can see that the information contained within example‘s Claim looks exactly the same as it did before example had an associated SPUser object. The display name we just set is not contained within the user’s Claim; it is only maintained within the SPUser object.

Conclusion
By following the above steps each time a new user is created, you guarantee consistency with each new user’s ability to access the site (and not have read access to all site content by default if this is not the desired behavior) and how the new user’s name is displayed. I strongly encourage you to automate this process using PowerShell or the object model if you need to create a lot of new users.
Have any questions, comments, or ideas you want to share? Feel free to post them in the comments below. If you will be at #SPSTCDC next month, feel free to come to my presentation on Claims-Based Identity at the August 11 meeting of the SharePoint User Group of Washington, DC. The meeting begins at 6:00 p.m.