Tagged: footer

Custom modern page header and footer using SharePoint Framework, part 3
This post is part 3 of what is currently a 3 part series of updates to my SharePoint Framework application customizer as the capability has evolved since entering developer preview. I have updated this code a number of times since publishing part 1 back in June. You can follow the history of these updates by reading my earlier posts:
In this post, I will update my custom header and footer SharePoint Framework extension based on the changes required for RC0 (SPFx 1.2.0) as well as to support the new tenant-scoped deployment option for SharePoint Framework solutions.
Release Candidate now available
Changes are coming fast in the SharePoint Framework world! Last week, Microsoft announced the Release Candidate (RC0) for SharePoint Framework Extensions with SPFx v1.2.0. A few days prior, I noticed some page placeholder names had changed and my extension’s onRender() method was no longer being called:
Looks like big changes are happening with #SPFx page placeholders this morning! I'm seeing new names (Top, Bottom) on pages in modern sites.
— Danny Jessee (@dannyjessee) August 24, 2017
I noticed my header/footer extension stopped working this morning and saw this in the console. pic.twitter.com/Lfgjgd9eiA
— Danny Jessee (@dannyjessee) August 24, 2017
Still seeing PageHeader and PageFooter on modern page experiences in classic sites but my extension isn't working on them now, either. #SPFx https://t.co/nS4IsrIOt2
— Danny Jessee (@dannyjessee) August 24, 2017
Sure enough, my suspicions were confirmed in this Github issue and just a few short days later we had a new release candidate!
You can read the details about all of the changes in the RC release notes. Here’s a quick summary of what I needed to do to update my extension project:
1. Update package.json to reflect the updated versions of SPFx dependencies and devDependencies. Mikael Svenson has a great write-up of this process in this blog post. I essentially had to change any dependency on 1.1.1 to 1.2.0 instead.
2. Run gulp –upgrade (dash dash upgrade) to update my project’s config.json file.
3. Update my HeaderFooterApplicationCustomizer.ts to do the following:
– Leverage the updated placeholderProvider.
– Use updated placeholder names Top and Bottom as well as new types PlaceholderName and PlaceholderContent.
– Explicitly call onRender() from my onInit() method.
You can examine all the differences in my code changes here.
Update for tenant-scoped deployment
Even before this week’s RC0 announcement, I knew I already had to do some work to update my extension. While I was attending SharePoint Fest Seattle last month, Microsoft announced the ability to perform tenant-scoped deployments for SharePoint Framework parts and extensions. This is a great update that eliminates the need to manually install the “app” associated with my extension on every site. Instead, when deploying the package to my tenant’s app catalog, I can check a box to automatically make the solution available to all sites within my tenant (or “organization”):
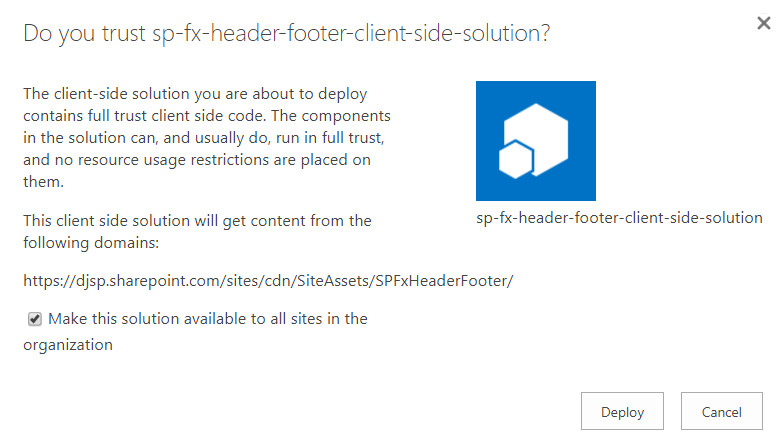
To add support for tenant-scoped deployment, I added the following line to my package-solution.json file:
“skipFeatureDeployment”: true
This marks the solution as being eligible for tenant-scoped deployment. Note that I still left the feature definition present in this file. This enables the solution to still be installed on individual sites via Site Contents > Add an app should the tenant administrator decline to perform a tenant-scoped installation.
Adding the user custom action for the extension in a tenant-scoped deployment
If you check the box labeled Make this solution available to all sites in the organization before pressing Deploy, you will need to manually add the user custom action associated with the extension on any site where you would like the custom header and footer to be rendered on modern pages. If you deploy the extension at tenant scope, it is immediately available to all sites and you do not need to explicitly add the app from the Site Contents screen. However, because tenant-scoped extensions cannot leverage the feature framework, you will need to associate the user custom action with the ClientSideComponentId of the extension manually. This can be accomplished a number of different ways. Some example code using the .NET Managed Client Object Model in a console application is shown below:
using (ClientContext ctx = new ClientContext("https://[YOUR TENANT].sharepoint.com"))
{
    SecureString password = new SecureString();
    foreach (char c in "[YOUR PASSWORD]".ToCharArray()) password.AppendChar(c);
    ctx.Credentials = new SharePointOnlineCredentials("[USER]@[YOUR TENANT].onmicrosoft.com", password);

    Web web = ctx.Web;
    UserCustomActionCollection ucaCollection = web.UserCustomActions;
    UserCustomAction uca = ucaCollection.Add();
    uca.Title = "SPFxHeaderFooterApplicationCustomizer";
    // This is the user custom action location for application customizer extensions
    uca.Location = "ClientSideExtension.ApplicationCustomizer";
    // Use the ID from HeaderFooterApplicationCustomizer.manifest.json below
    uca.ClientSideComponentId = new Guid("bbe5f3fa-7326-455d-8573-9f0b2b015ff9");
    uca.Update();

    ctx.Load(web, w => w.UserCustomActions);
    ctx.ExecuteQuery();

    Console.WriteLine("User custom action added to site successfully!");
}
If you decline to check the box to allow tenant-scoped installation when you upload the .sppkg file to the app catalog, the extension will still be available to manually add to any site via Site Contents > Add an app. If you manually add the extension to a site in this way, the user custom action registration will be handled automatically via the feature framework (as it has in the past). No additional code is necessary to register the user custom action in that case.
Version 1.1.4.0 now available!
All of my updated code (RC0 updates and support for tenant-scoped deployment) can be found within my Github repository at:

Custom modern page header and footer using SharePoint Framework, part 2
This post is part 2 of what is currently a 3 part series of updates to my SharePoint Framework application customizer as the capability has evolved since entering developer preview in June. Please see the links to parts 1 and 3 below.
When I first released my custom modern page header and footer using SharePoint Framework in June, there was one significant shortcoming with the built-in page placeholders on modern page experiences that made them impractical to use for a site-wide header and footer solution: modern site pages did not contain a PageFooter placeholder.
When application customizers were initially rolled out, modern site pages did not contain a PageFooter placeholder. Image from June 2017.
However, on or around August 11th, I noticed that the PageFooter placeholder started appearing on modern site pages. With this change, all modern page experiences now had PageHeader and PageFooter placeholders.
Modern site pages now contain a PageFooter placeholder! Image from August 2017.
Update to the SharePoint Framework application customizer
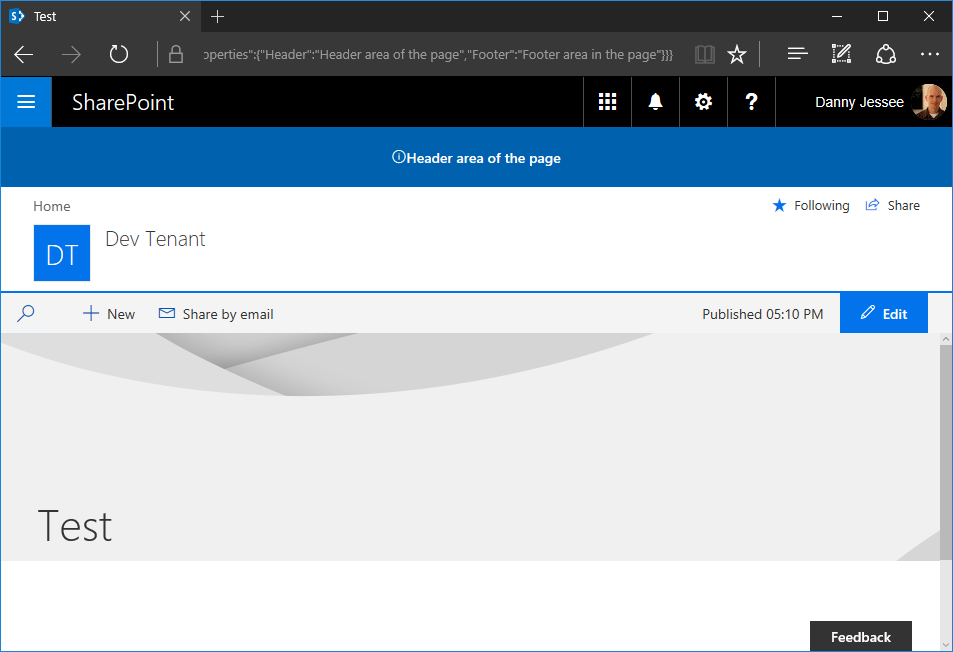
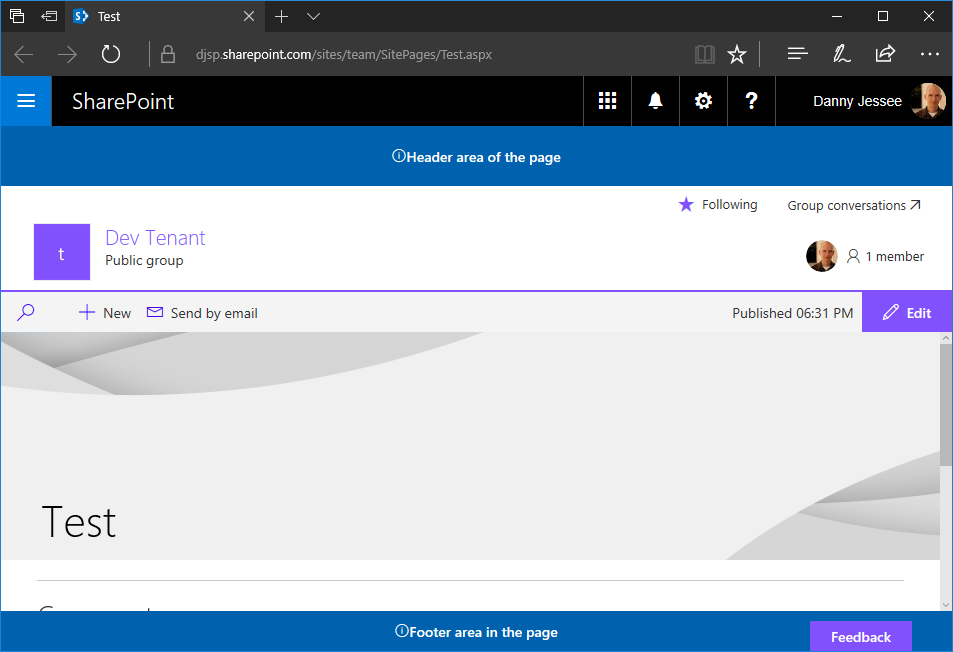
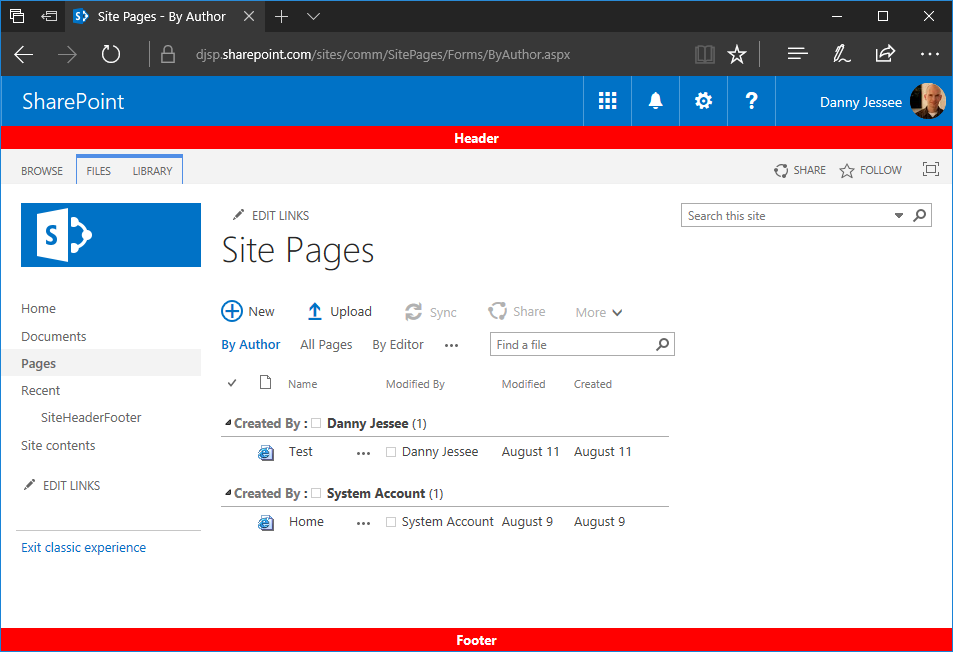
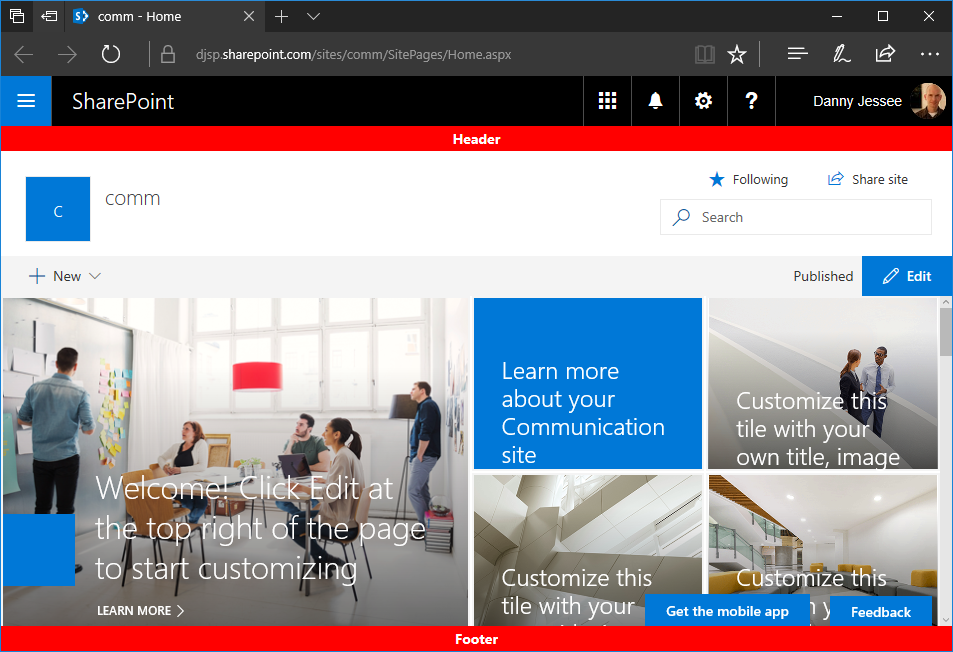
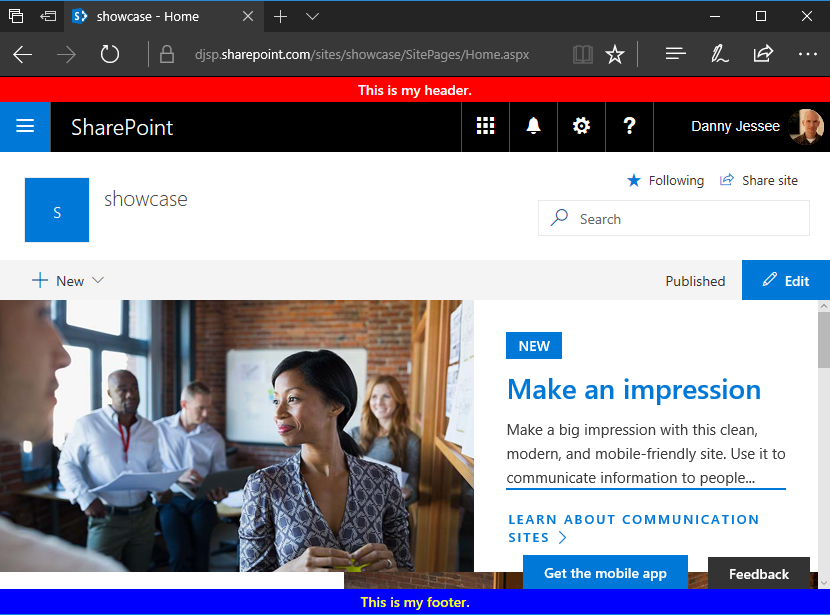
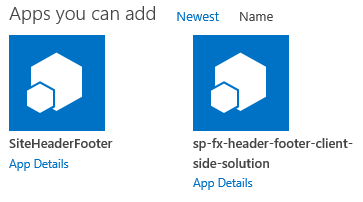
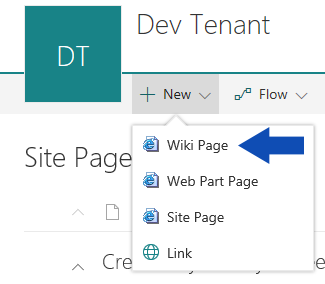
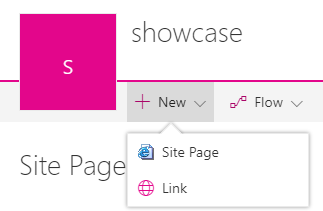
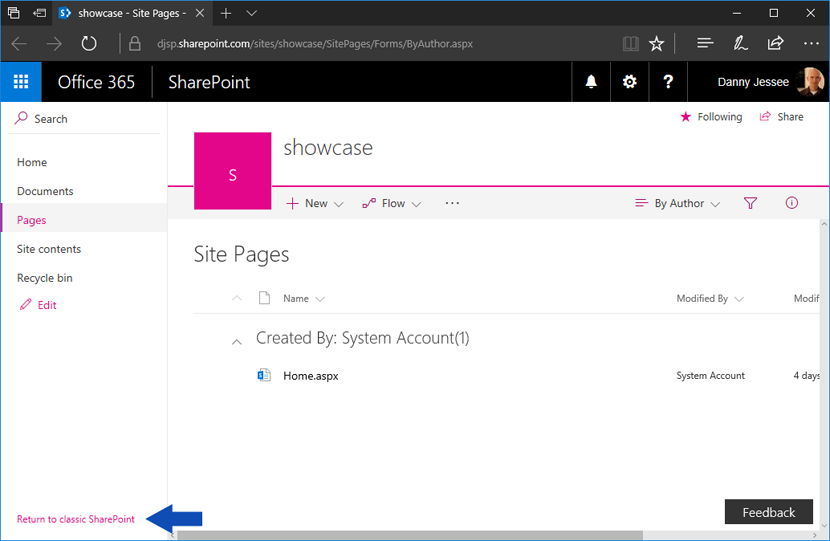
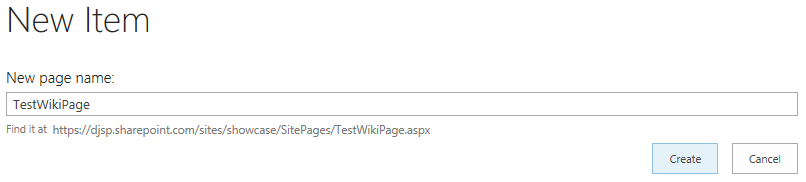
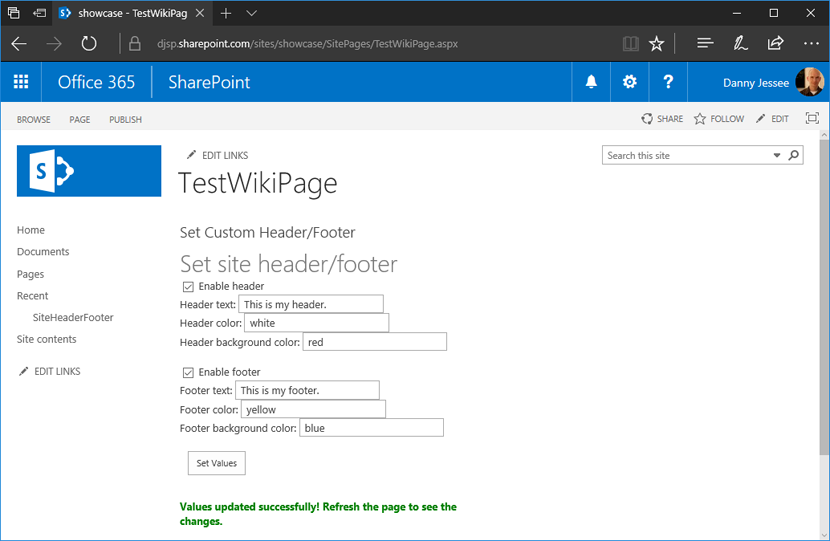
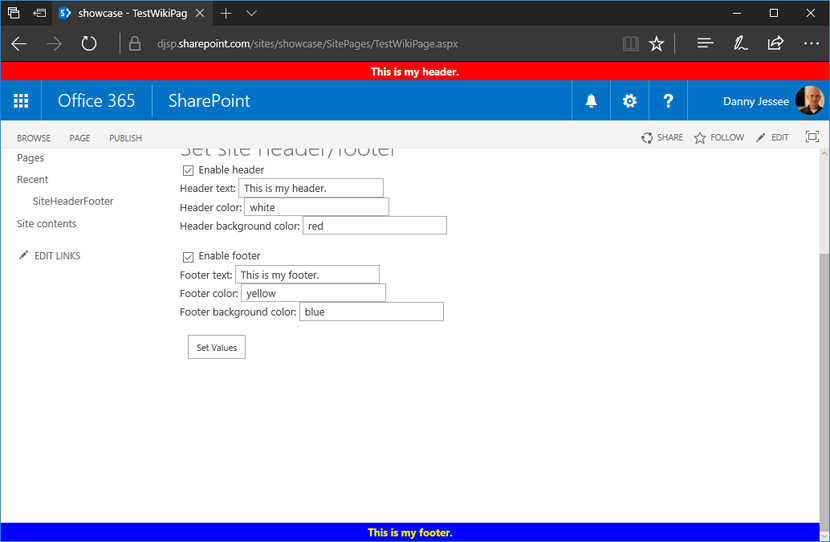
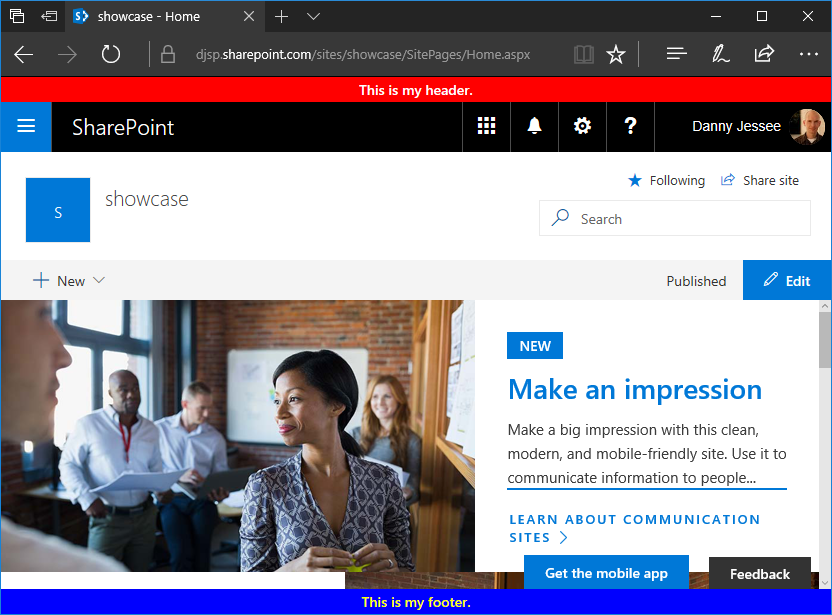
My original SPFx application customizer could not make use of the built-in page placeholders because at the time, modern site pages did not contain a PageFooter placeholder. Also, the PageHeader placeholder was located beneath the Office 365 suite bar instead of above it, which is where I had chosen to inject my custom header for classic pages using a SharePoint-hosted add-in. Because of this, I relied on fragile and unsupported DOM manipulation techniques that would break if Microsoft ever changed the class names or IDs of the main page content areas (modern site pages currently use a I decided that having the page header beneath the suite bar was a worthwhile tradeoff to be able to leverage the built-in page placeholders and eliminate all of the ugly DOM manipulation I was previously doing. The updated code can be found in the HeaderFooterApplicationCustomizer.ts file contained within my Github repository at: https://github.com/dannyjessee/SPFxHeaderFooter Update to the SharePoint-hosted add-in Since I decided to leverage the built-in PageHeader placeholder on modern pages beneath the suite bar, for the sake of consistency I also updated my SharePoint-hosted add-in to provide the option to inject the custom header in the same location on classic pages: My SharePoint-hosted add-in now offers the ability to select whether to render the header above or below the suite bar. Code for the updated SharePoint-hosted add-in may be found on Github at the following location: https://github.com/dannyjessee/SiteHeaderFooter Note that you must disable NoScript (if it is enabled) in order to install and utilize this add-in. For more information about NoScript and how to disable it, check out my post on NoScript and modern sites. Putting it all together With the SharePoint-hosted add-in and SharePoint Framework application customizer both installed on the same site, you can render a custom header and footer consistently across all classic and modern page experiences within that site. Custom header and footer rendered on a classic page experience within a communication site using a SharePoint-hosted add-in. Custom header and footer rendered on a modern page experience within a communication site using a SharePoint Framework application customizer and page placeholders. Although the title of this post indicates the particular objective I achieved, this post walks through the steps that are necessary for any scenario that requires you to have access to the classic page experience on a communication site or modern team site in SharePoint Online. In my case, the reason for this is to leverage a “legacy” app part on a classic wiki page that allows users to configure settings for a custom page header and footer. Unlike “classic” SharePoint Online sites, communication sites and modern team sites do not give you the ability to create a new wiki page in the Site Pages library that allows you to add “legacy” web parts. SharePoint Framework client-side web parts are the only custom web parts supported on modern page experiences. Microsoft didn’t necessarily make it “easy” to do all of this, but it is possible and the process is simple if you follow the steps below. Step 1 (modern team sites only): Disable NoScript This step is required because my app part uses custom script to access and manipulate values stored in the site property bag. In this post, I explain the differences between modern team sites and communication sites when it comes to the default NoScript setting and show how you can query a site’s NoScript status and change it if necessary. Because communication sites are not NoScript sites (apologies for the double negative), you do not need to perform this step on them. Step 2: Install the SharePoint-hosted add-in My SharePoint-hosted add-in surfaces an app part that reads configuration settings for the custom header and footer from the site property bag and allows users to update them. I built the .app package for the add-in and deployed it to my tenant’s app catalog site. This made it available to install in my communication site and modern team site: After installing my SharePoint-hosted add-in’s SiteHeaderFooter.app file and my SharePoint Framework Application Customizer Extension’s sp-fx-header-footer.sppkg file to my tenant’s app catalog site, both are available to install on my new communication site. We will install the SharePoint Framework Application Customizer Extension in step 4 below. Notice how the addanapp.aspx page retains the “classic” page experience. This was my first clue that it would still be possible to unlock other classic page experiences–such as a classic wiki page–within these modern sites. Step 3: Create the classic wiki page and add the “legacy” app part If you navigate to the Site Pages library in a “classic” site, you will see the option to create a new Wiki Page within that library: The Site Pages library within “classic” sites still allows you to create Wiki Pages with the classic page experience. However, if you navigate to the Site Pages library in a communication site or modern team site, this option does not exist: The Site Pages libraries within communication sites and modern team sites do not expose the option to create new Wiki Pages. How can we add a new wiki page to the Site Pages library if the option isn’t there? By clicking the “Return to classic SharePoint” link that appears in the lower left corner of the screen: There is much to be said about what happens when you click that link, but for our purposes it does exactly what we need (at least for the duration of our session). When viewing the same Site Pages library returned to the classic page experience, clicking the New link now prompts you for a new page name: Specifying the page name and pressing Create gives us a new “classic” wiki page to which we can add the app part from the SharePoint-hosted add-in. Once that is done, I can configure the custom header and footer parameters and press Set Values: Refreshing the page will display the header and footer, since this is a classic page experience that supports the user custom actions used by the add-in to embed the JavaScript responsible for rendering the header and footer: Installing and configuring the SharePoint-hosted add-in handles the rendering of the header and footer on all classic page experiences within a site. However, the site home page will still not display the header and footer because modern page experiences do not support user custom actions. That’s where the SharePoint Framework Application Customizer Extension comes into play. Step 4: Install the SharePoint Framework Application Customizer Extension Return to the addanapp.aspx page we visited earlier when installing the SharePoint-hosted add-in to our site. This time, choose to add the sp-fx-header-footer-client-side-solution. You can read all about this SharePoint Framework Application Customizer Extension and how it works in this blog post. This will activate the associated site-scoped feature that renders the header and footer on modern page experiences. You can confirm this by going to Site Settings and ensuring the SPFx HeaderFooter Application Extension – Deployment of custom action feature is Active: When this feature is Active, the JavaScript associated with our SharePoint Framework Application Customizer Extension will execute on all modern page experiences. Step 5: Enjoy the results Below you can see my custom header and footer applied on both a new communication site and a modern team site: Custom header and footer rendered on a communication site. Custom header and footer rendered on a modern team site where I followed the same steps performed on the communication site in the steps above. Key takeaways – By returning to classic SharePoint, it is still possible to add new wiki pages to the Site Pages library in communication sites and modern team sites in SharePoint Online (where the option to create them is not shown by default).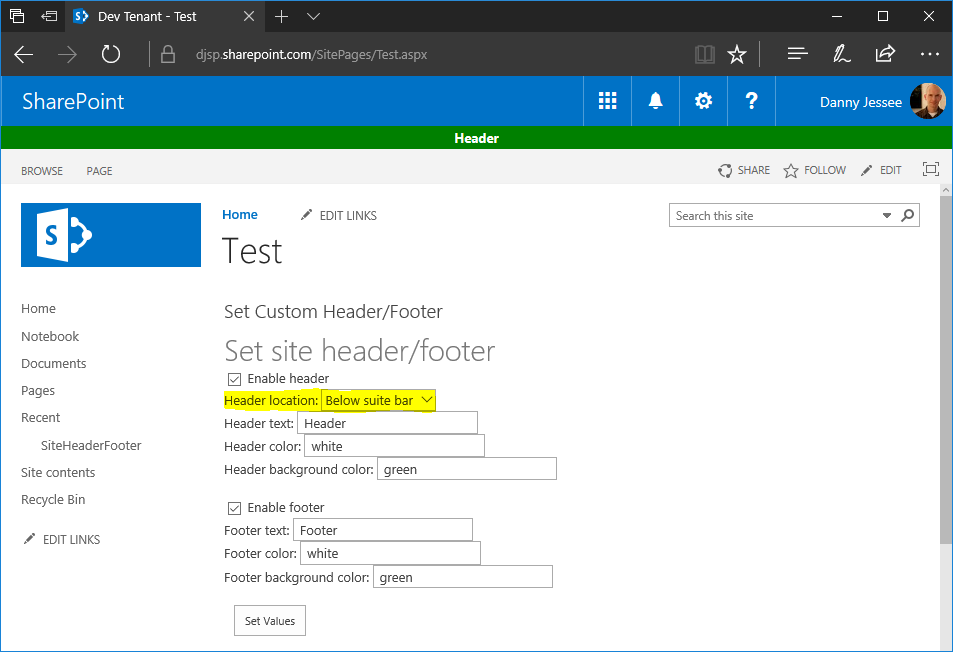
Applying a custom header and footer on communication sites and modern team sites


– Restoring this classic page experience to modern sites allows you to leverage “legacy” app parts that were built using the add-in model without having to rebuild the functionality using a SharePoint Framework client-side web part (NOTE: this is probably something you will still want to do in most cases).
– Even when your “Return to classic SharePoint” session cookie expires, your classic wiki page will remain in the Site Pages library and is still completely accessible.
– Applying branding such as a custom header and footer to modern sites–especially those that contain a combination of classic and modern page experiences–will require a multifaceted approach that may include capabilities from the SharePoint add-in model as well as SharePoint Framework.