Tagged: SharePoint
Speaking at SharePoint Fest DC 2017!
This April, I will be joining SharePoint experts from around the world at SharePoint Fest DC 2017! I am very excited to be debuting a new session this year:
DEV 200 – Updating Legacy SharePoint Customizations to the Add-in Model
Many organizations using SharePoint maintain large portfolios of custom code solutions that leverage different legacy development approaches advocated by Microsoft through the years, and most of the custom code developed for earlier versions of SharePoint cannot be directly migrated to the cloud. In this session, you will learn how the SharePoint Add-in model allows you to develop maintainable customizations that have traditionally been accomplished using custom server-side code. You will learn how to categorize the types of user interface, declarative, and timer job customizations you may have performed with farm and sandboxed solutions in the past and understand how to approach developing each of them using techniques from the Add-in model.
If you register now and use code JesseeDC200 at checkout, you can save $200 off the purchase of a Gold, Platinum, or Diamond pass!
This will be my third SharePoint Fest event and my second SharePoint Fest DC. I absolutely love this conference and the DC location is as convenient as it gets for mass transit…just step off the train and you are there! I look forward to seeing you there.
Using Claims Authentication to Configure Multiple Authentication Providers in a CloudShare Environment
This post originally appeared in the CloudShare Community Blog on October 25th.
CloudShare’s very own Chris Riley recently shared an environment of mine in a blog post about network orchestration. This environment leverages some exciting new capabilities in SharePoint 2010: namely Claims Authentication in a SharePoint 2010 web application and the ability to configure multiple authentication providers in a single zone. These technologies offer exciting prospects to anyone who previously had to configure separate host headers and URLs for different extranet customers, depending on the mechanism required for each subset of users to log in.
How does this look to end users? To see Claims in action, fire up the “SharePoint 2010 (Clean Installation)” image from the shared environment, open Internet Explorer and navigate to http://intranet.contoso.com.
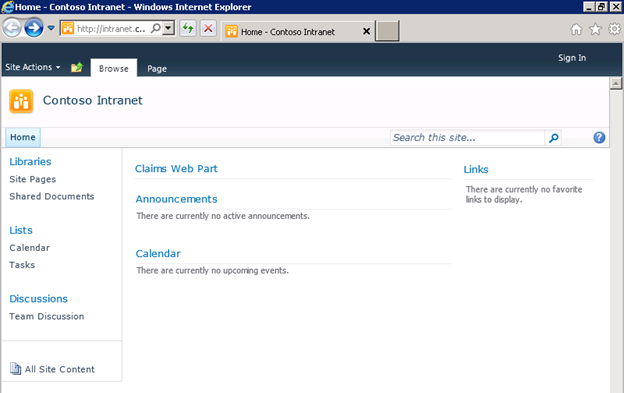
You’ll see an empty Team Site with a “Claims Web Part” at the top. Since anonymous access to the site is enabled, the Claims Web Part will initially be empty.

Press the “Sign In” link at the top right of the page. The page that appears, http://intranet.contoso.com/_login/default.aspx, is new in SharePoint 2010 and allows users to choose from all the different authentication providers configured for that web application. (As a side note, there are some exciting opportunities for custom code development here, including the ability to automatically redirect users to a specific authentication provider based on parameters such as their IP address, bypassing this page of options entirely! After all, not all end users are going to appreciate the distinction between “Windows Authentication” and “Forms Authentication.”)
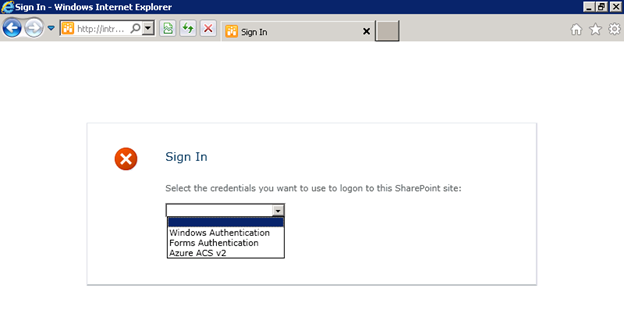
In this web application, I have configured the following providers:
- Windows Authentication – standard NTLM credentials.
- Forms-Based Authentication (FBA) – you may remember this option from MOSS. In this environment, I have created a custom membership provider that validates inputted credentials against a SQL Server database. In practice, FBA can be used to authenticate external users against Active Directory or any other account database.
- Azure Access Control Services (ACS) v2 – allows users to log in with credentials from Open ID providers such as Windows Live ID and Facebook.
For a more in-depth read about how to configure Azure ACS v2 as an authentication provider in SharePoint, including adding other Open ID providers such as Google and Yahoo, check out this blog post by Travis Nielsen.
If I choose Azure ACS v2 (this can be given a friendlier name when you set it up as a Trusted Identity Provider through PowerShell), I will see the following screen. Claims Authentication relies on a series of HTTP redirects to seamlessly direct users between SharePoint and external trusted identity providers such as Azure ACS to log them in. This page is hosted completely outside of my SharePoint environment:
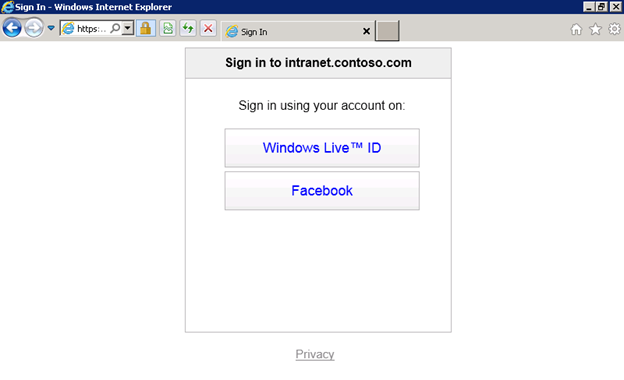
By choosing “Windows Live ID,” I will be redirected to https://login.live.com, where I will be prompted to enter my Windows Live ID credentials. (Similarly, you will be redirected to any of the other Open ID providers’ sites should you choose them instead.) After I sign in, another series of HTTP redirects takes place that eventually lands me back in my SharePoint environment, all logged in. The Claims web part on the page shows the various Claims that were sent by the Trusted Identity Provider in an XML-based Security Assertion Markup Language (SAML) token back to SharePoint:
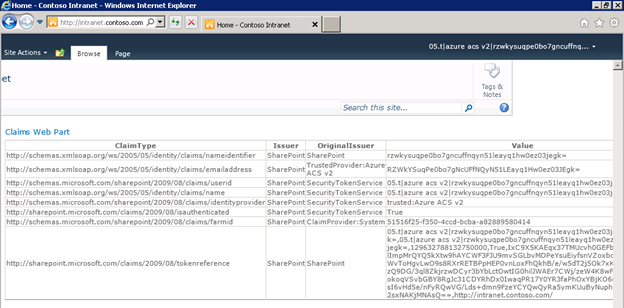
As an application developer, I can leverage these Claims (you see some examples of Claims in the screenshot above include nameidentifier, emailaddress, userid, name, etc.) to make various authorization (what resources may this authenticated user access) and personalization (how is this particular user or class of user’s experience customized) decisions about how to handle this user.
Claims-based authentication and Azure ACS offer exciting possibilities to application developers who are liberated from having to maintain (or even worse, design and develop!) a user management system and all the nightmares that go along with it (think about password resets, forgotten passwords, security requirements for maintaining account information, etc.) As Chris mentions in his blog post, the same paradigm can be applied using Active Directory Federation Services (AD FS v2) to support users logging in to a SharePoint environment using credentials from a trusted external domain.
That said, Claims-based authentication is not always as easy to set up and work with as it may seem. Using CloudShare, developers and IT professionals can focus their valuable time and energy on solving the issues surrounding the implementation of Claims-based identity in SharePoint 2010 and not be concerned with software licensing, hardware, or other infrastructure concerns.
Which SharePoint Front End Server Am I Hitting?
If you have ever worked in a network load balanced (NLB) environment with multiple SharePoint front end servers, you have no doubt had at least one occasion where only some of your users were seeing some sort of strange behavior. Perhaps some users receive a generic error message when accessing a page and others do not. Whatever the reason, it never hurts to be able to have users give you just a little bit more information to help you in the troubleshooting process.
Of course, you can always dig through the ULS log files on each front end server to look for any anomalies or to match up correlation ID values associated with generic error messages. But wouldn’t it be great if your end user could tell you that he or she is hitting front end #3 so you don’t have to waste time searching through the logs on front ends #1 and #2 first?
One potential solution to this problem (and there are no doubt more elegant ways to solve it) are to create multiple images such as the ones below:


Save each image with exactly the same name (such as frontend.jpg) and place it in the TEMPLATE\IMAGES directory of the SharePoint root on each front end (make sure you match up the correct image with each front end server!) Then, when something goes wrong for one user but not another, you can ask him/her to visit the following URL:
http://yourcompany.com/_layouts/images/frontend.jpg
Based on the number that appears, you will know exactly which front end that user is hitting!
I hope this information is useful to you. You could extend this by creating a custom URL action called “Front End Check” that allows certain users to hit the front end image link directly without having to remember it. Feel free to leave your thoughts and suggestions in the comments!